 |
|
|
|||||||
 |
|
|
Thread Tools | Display Modes |
 Nov 18, 2014, 03:12 PM // 15:12
|
#1 |
|
Ascalonian Squire
Join Date: Nov 2014
Guild: SenT/RiP
Profession: R/A
|
I made this tutorial for SenT, so i'm just sharing it to you now. Feel free to ask if you have any question. If you have any suggestion, post a message here
 UNDERWORLD SPEEDCLEAR TUTORIAL Introduction : This guide is only for experienced teams, with those tactics you can do a 15 in casual (or a 14 but your suicid need to be really strong). If your team is strong, doing a 16 in casual will not be a problem. The fastest time with the exact same splits is 15min by DS (6/8) FBGM and SenT 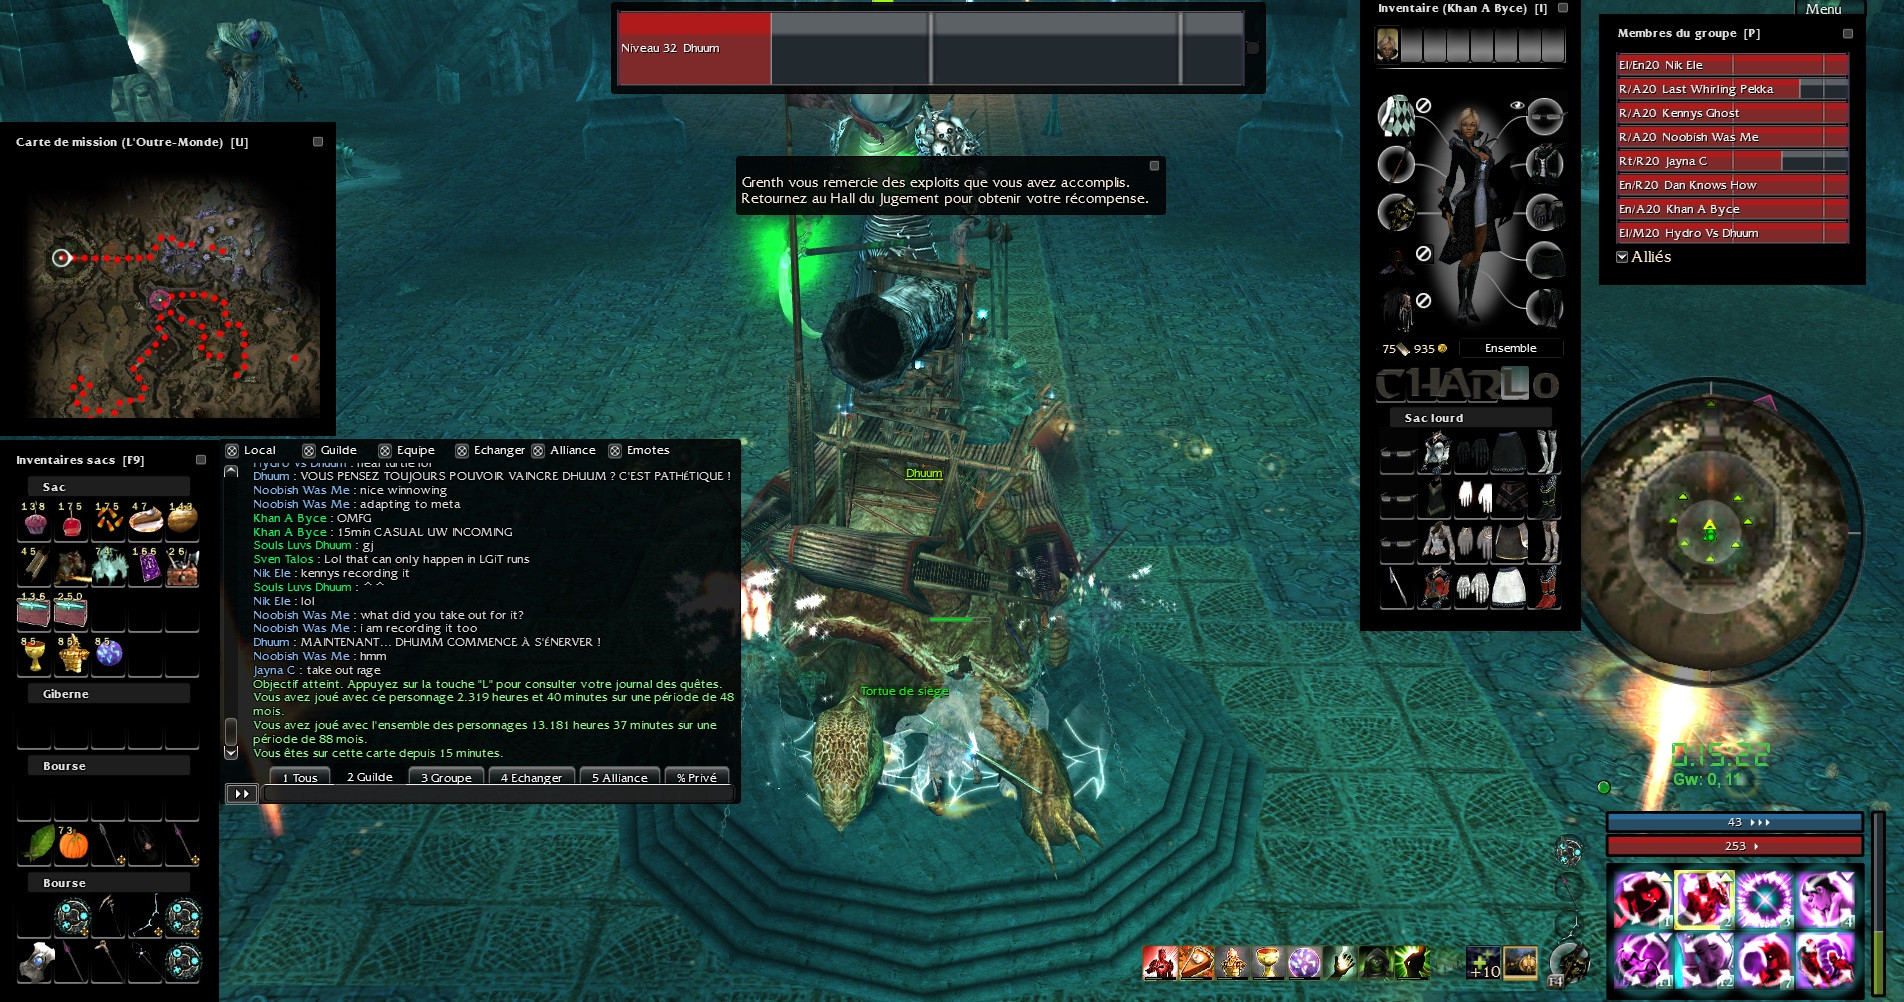 The underworld WR is 13 with some different splits (UWG split and gakiway) Summary : I - T4 II - T3 III - T2 IV - T1 V - Spiker VI - SoS VII - LT VIII - Emo IX - Dhuum sets X - Dhuum I -T4 :
a) BAR :
 Template : OgVDIcy8QaDfVbVGAyA3U8Q0lA b) Weapons and armor : Max armor with Geomancer's insignias, Sup vigor rune, +4 Earth Magic headpiece, +1 Energy Storage and 2 Runes of Attunement. Caster staff (+5 energy, +5wE, 20% enchant) 30/30 Caster set (Spear with "Let the Memory Live Again" Inscription, 20% Ench and an Earth Magic focus with 20/20 mods) Def set (Shield +10 armor Vs Earth damage insc and a +45 health mod). Pcons : Candy Apples, Birthday Cupcakes, Golden Eggs, Candy Corn, Slices of Pumpkin Pie, War Supplies and Powerstones. You NEED to have a Powerstone with you every time you do this because when the mindblades are on you, you have a chance to get rupted. Also if you don't cast Obsidian Flesh fast enough you can get sigged. Rainbows are optional ofc but if you really want to push it and get crippled these are good to have. Lunars: Not really needed on Ele if you plan on going dumbassway aka Mesmer T4 these are necessary. c) The Complete run : Remember to switch to your staff when EEing, Def set when in the safespot or taking dmg otherwise, caster set when you are using Sliver. Chamber : This should be simple, Wastrel the nightmares during first spike and only use 1 wastrel on 1 nightmare, if there are no nightmares focus on the main ball. I'll not write that many things about running through mnts, you'll see videos with all spots to HoS, just EE right after the T3 used HoS on you) Pits : There are exactly 5 different bottom group spawns(4-1 Threshers + 3-1 Collectors) you can get and regardless of the spawn there will always be at least 3 foes you have to kill and the most enemies you can have in 1 spawn is 4. If the spawn only has threshers in it all you have to do is use your wastrels to get them down. When you have 1 Collector in the spawn you can just Wastrel him with the Threshers be careful not to get too close though, this will make the Collector go out of the ball and it's just going to be a big clusterRED ENGINE GORED ENGINE GORED ENGINE GORED ENGINE GO with all the bone horrors he can make from the threshers. If you get lucky and get 3 Collectors you can just get the derp one next to a wall and bring the other 2 next to him and Wastrel them down. When you have killed the bottom group sidewalk to the top, agro the group next to the 2 Chained Soul spawn and go to the usual spot to kill all the Collectors. Try to not to move too slow because the Collectors might get past you or get you stuck. Please don't use your Sliver on the big ball of Collectors if you only have 4-5 Collectors or one of them breaks outside the ball you have the permission to use Sliver here. If you get unlucky and one of them breaks you might have enough agro to just cast Sliver and stand next to it and kill him when he's casting Animate Bone Horror. After the Collectors are dead you pull up the Threshers that spawn next to the 2 Chained souls and Sliver/Wastrel them down. After those are dead you have 2 options: pull the Terrorwebs on top of the big ball of Threshers you have or Sliver the Terrrorwebs while Wastreling the Threshers. Either way is ok, I find the 2nd one faster if you get lucky at Sliver recharge or if you're bad at pulling them. After the Reaper is popped be ready for the quest and EE down when the T3 breaks his SoH. Quest : If you get any skeles in the quest, I suggest you go to the safespot to make it easier, just make sure that you have the 2 Threshers from the hill agroed so you won't run out of energy. in the safespot pick your targets carefully and if only 1 Terrorweb is within Wastrel range of the skeles only target that one. When you get out of the safespot be aware of the bridge skele since he can and will kill you if you're not careful. For the last spawn there are again, 2 ways to kill it. I just see if they're all within Wastrel range, I don't even bother to use sliver but if they're not, I'm going to Sliver 1 down and Wastrel the 2 others. After the last spawn is dead EE down to the T3 who should already be waiting for you and make your way to Plains. Plains : Please don't run around like a headless chicken when killing the Pitside Skele. Just relax, cast your enchantments and SIDEWALK next to the Skele. Wastrel the wailings and not the skele. Now your T3 wants you to pop mindblades for the glitch, you got 2 options : Sliver the rider with wailings (wastrells them too) then kill the dryder ball after. Pull one (or 2) dryders on rider and wastrell them, keep wailings for lasts dryders. 4h : Now you just pull the bosses and kill them, if the patroll is coming make sure to agro them cast a few set of wastrels before trying to cast Obby Flesh. d) Tips There is not that many tips, just practice it, there is videos to show you the job : https://www.youtube.com/watch?v=r404OcRoQ0Q https://www.youtube.com/watch?v=DmoKYw-LsHM (Gakiway) Special Credits to Moonzy for the Tutorial (I just changed like 3 sentences xD), Kaspar and Hydro for their videos (Moonzy's videos were before lavafont nerf) II - T3 :
a) BAR :
 b) Weapons and armor : Usually you'll need a full HP armor with blessed insignia. +1 +3 Expertise headpiece. Longbow Vampiric daggers q5 or q6 (+15% wE, vampiric, 20% enchant) Vampiric scythe (10% HTC vampiric 20% enchant) Caster staff (+5 energy, +5 energy wE, 20% enchant) Caster weapon + shield (+5 energy, 20% enchant // +45HP wE, -2 wE) Pcons: Candy corn, Candy apple, Cupcake, Golden egg, Ghastly stones( for backside) Powerstone (incase rupted at semi glitch) (optional): War supplies (really suggest these for new people on this area) Slice of pumpkin pie (max attack speed very usefull on 4h and killing collector at pits) Lunars (In case you're afraid of 4h ) Rainbows (when going for speed and u happen to get crippled on mnts) c) The complete run : I will not write that many things on the beginning of the run, all you need is to HoS at spots to make the run faster : 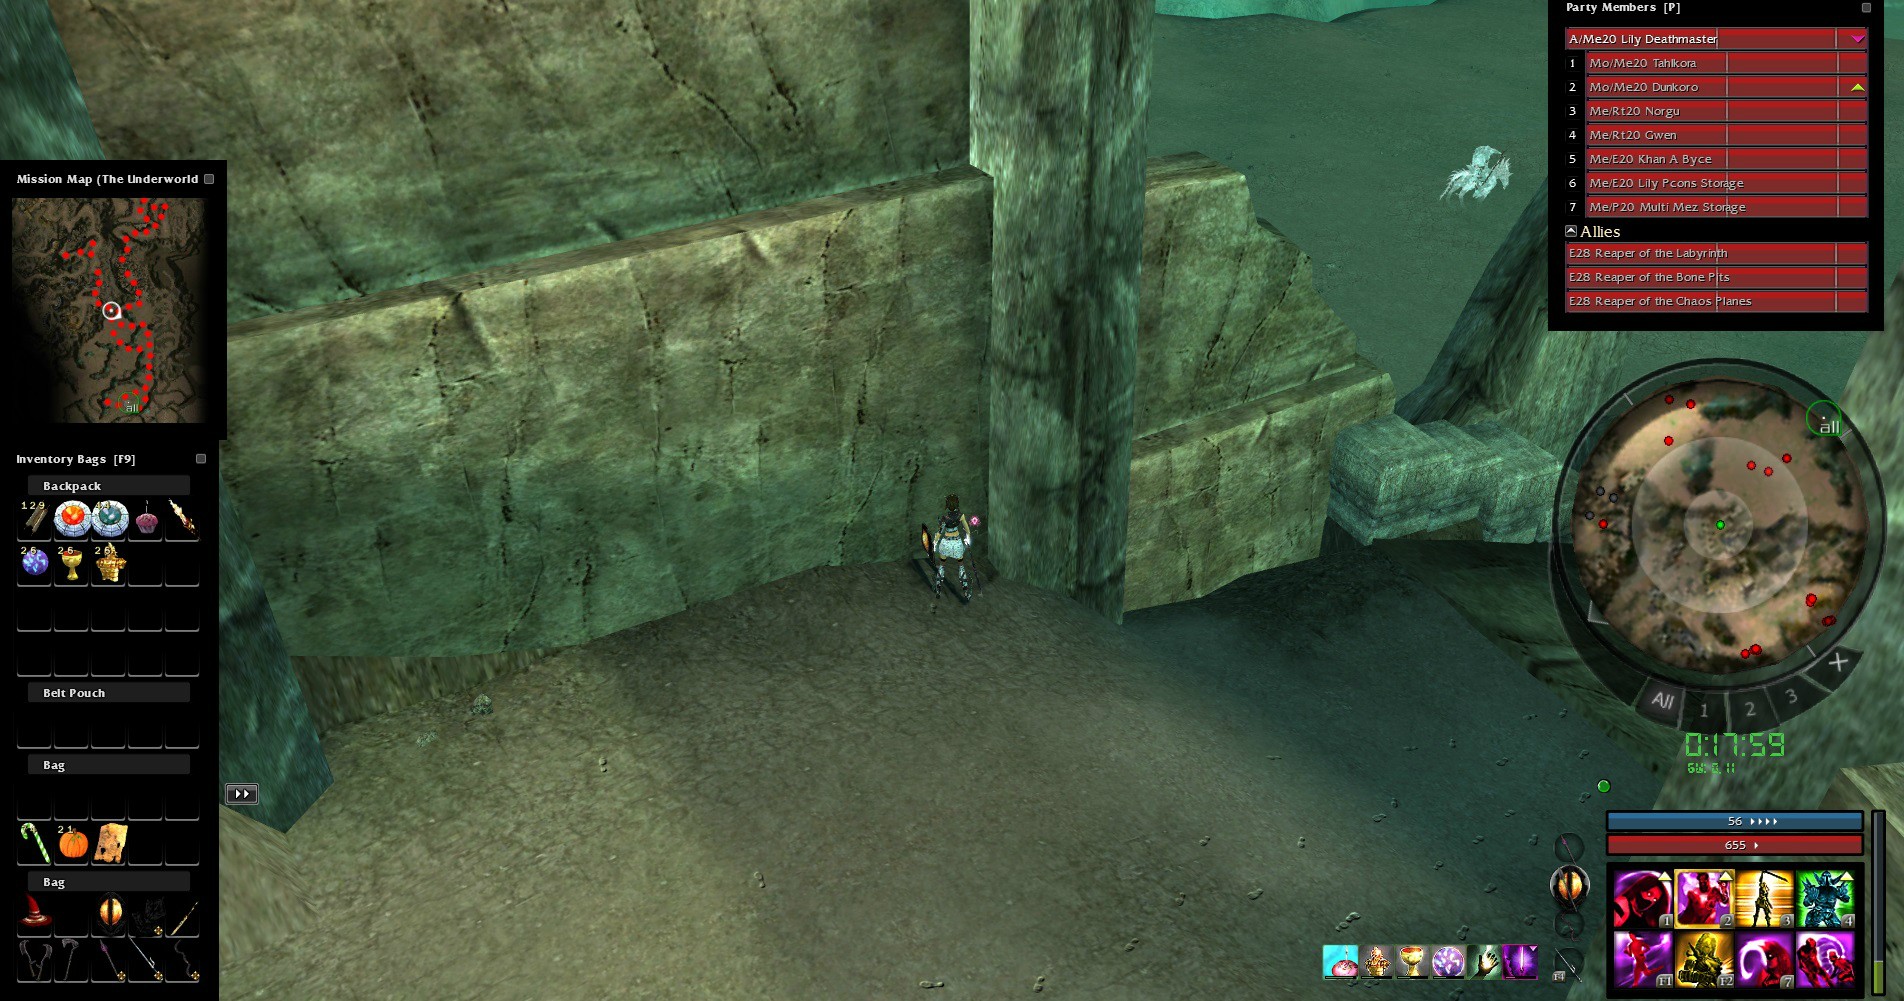 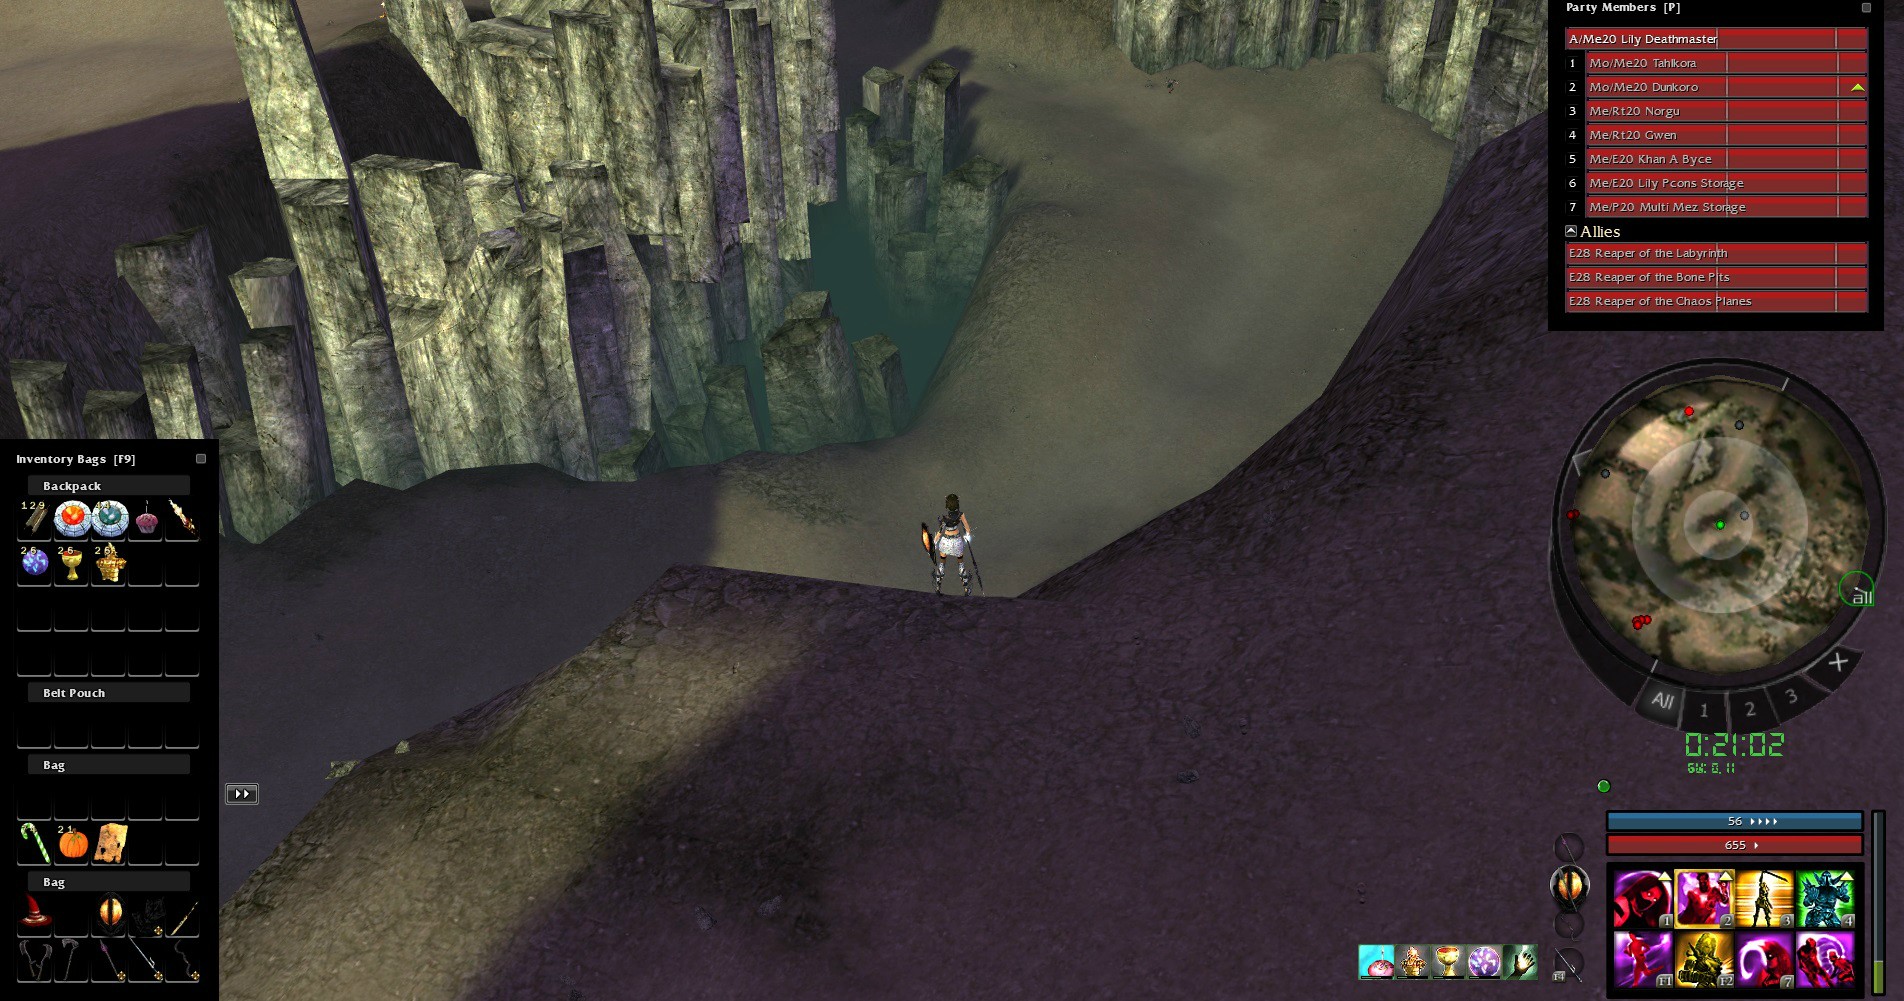 Pits: Now the pumpkin pie slice is very usefull, it allows u to kill collector alot faster which then makes ur skele glitching alot easier.when starting to glitch skeles its good to have fresh sf before u agro them but sometimes u can't avoid it running out while just agroed them. best way to cast sf is to start running forward just 1-2 seconds before sf ends--> skeles break agro and when u cast sf they get back to ur agro again and then just keep glitching like normally. or if ur already close to spot where u hos down Dont start casting sf since with 4 skeles ur dead in seconds. I think the best spot to use soh is here 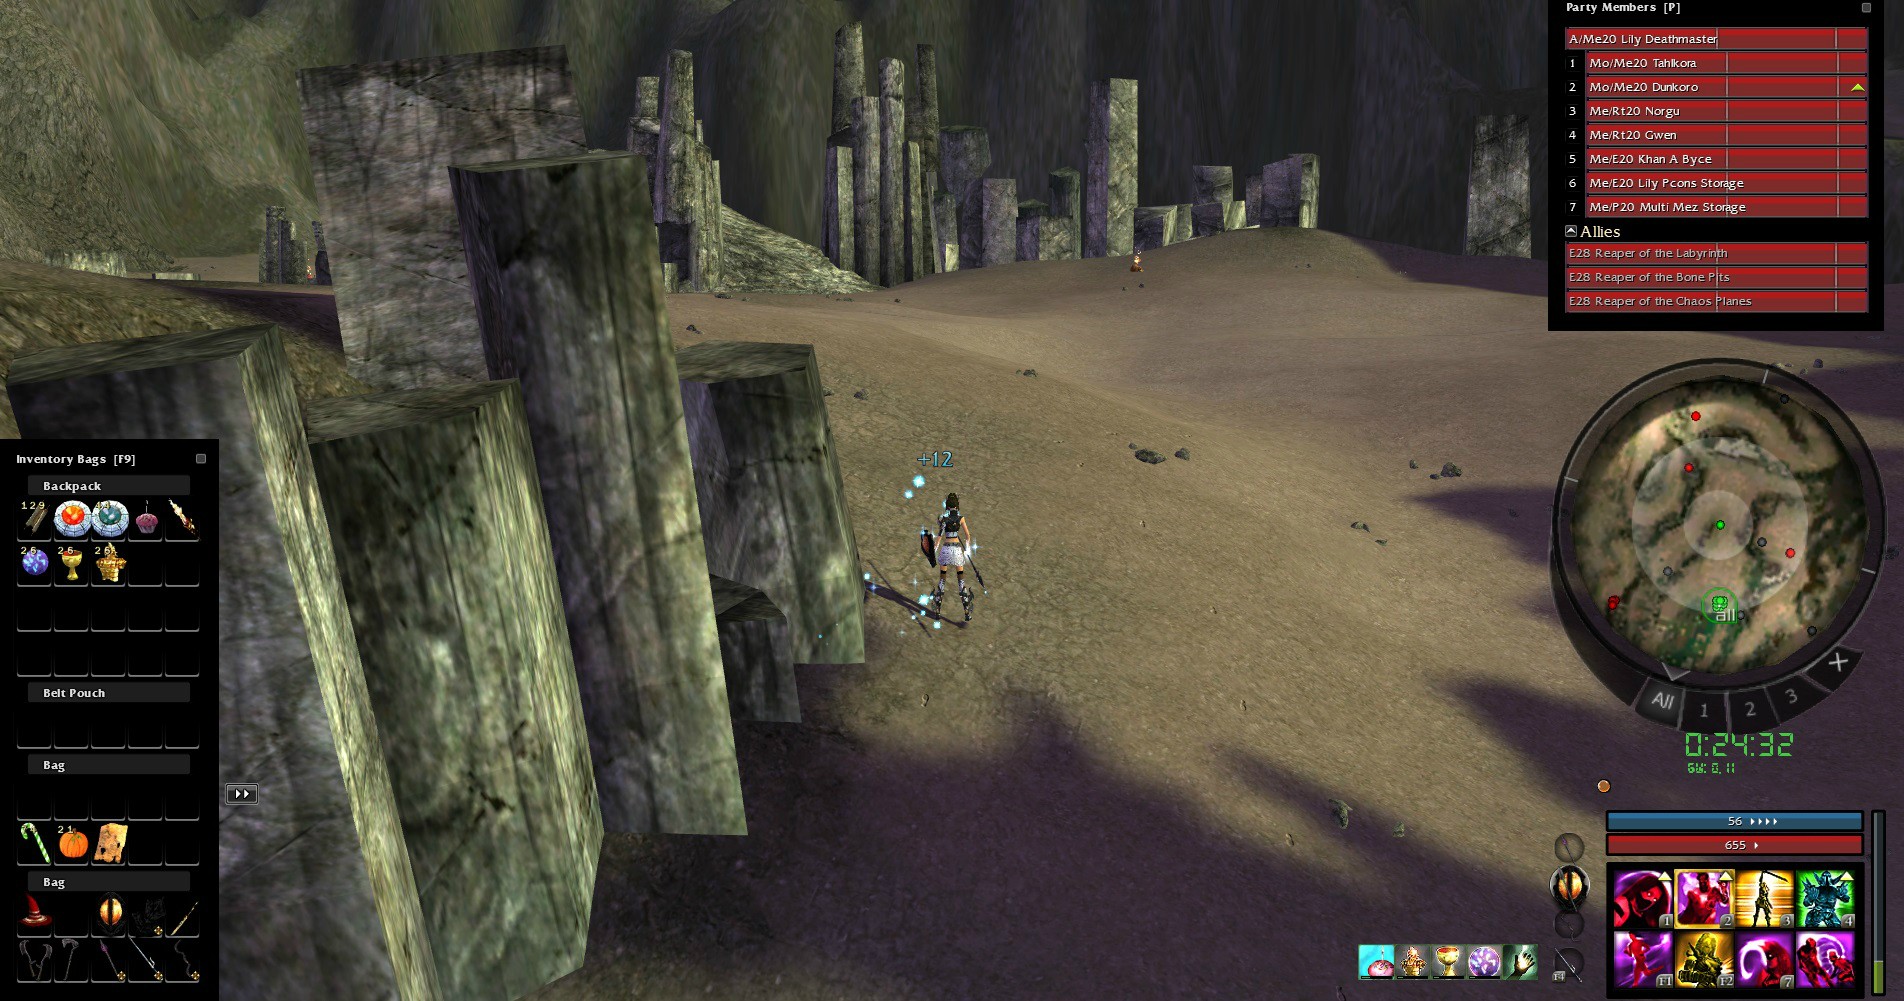 Since it allows you to Whirling out from below bridge in many different spots, but always try to run below the bridge again because sometimes when u use ww to cancel soh u just hit the wall below bridge and get stuck there with 3-4 skeles. and when glitching all 4 skeles you need to pull the patrol one below the bridge or it will now glitch. then just run back to center wait for T4 to almost be done with popping, leave soh at center (near the « wall » for the T4) and go take quest. If u happen to have top agro just kill it or if going for time, let t4 pull top agro away from their spot and he will kill them. Quest: Usually the T4 will wait you to break SoH, in that way he will just EE on you so you'll start the quest a bit faster. Run to backside and if you see a skele just pop a Gstone, equip your daggers, put honor and kill everything from the quest. Just in case you're weak, there is the 2 safe spots : 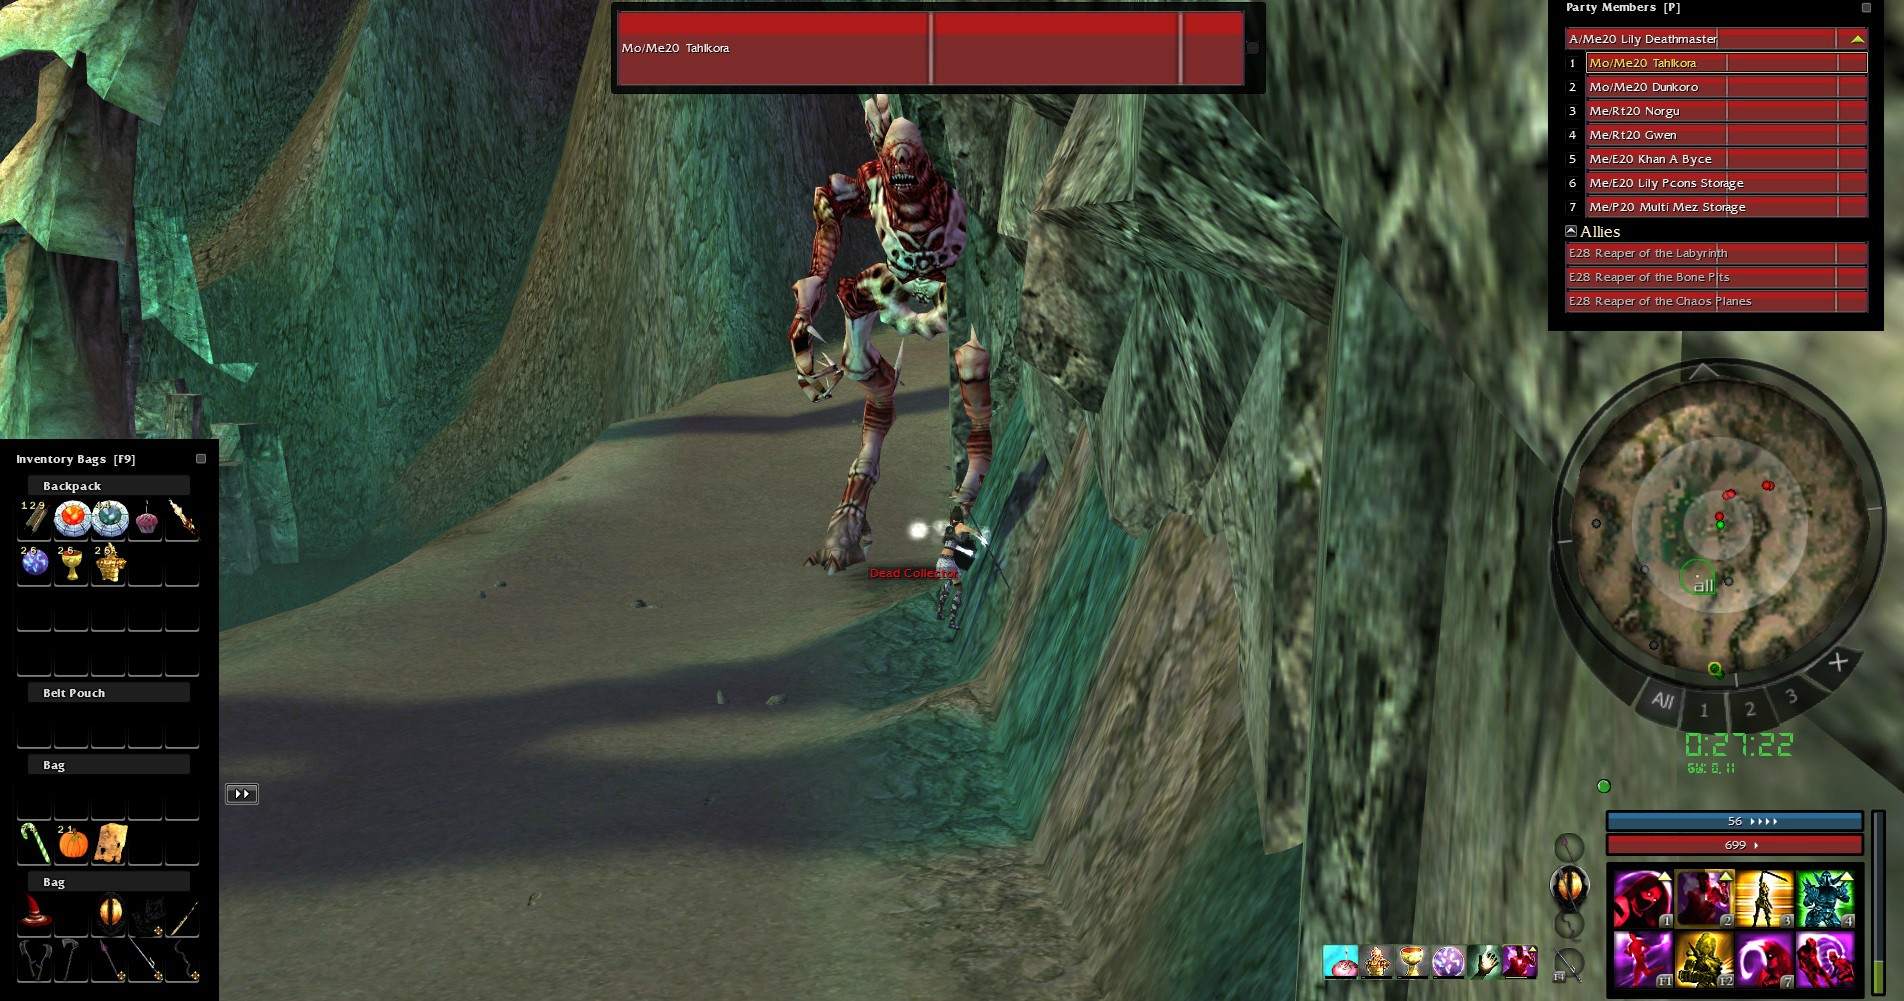 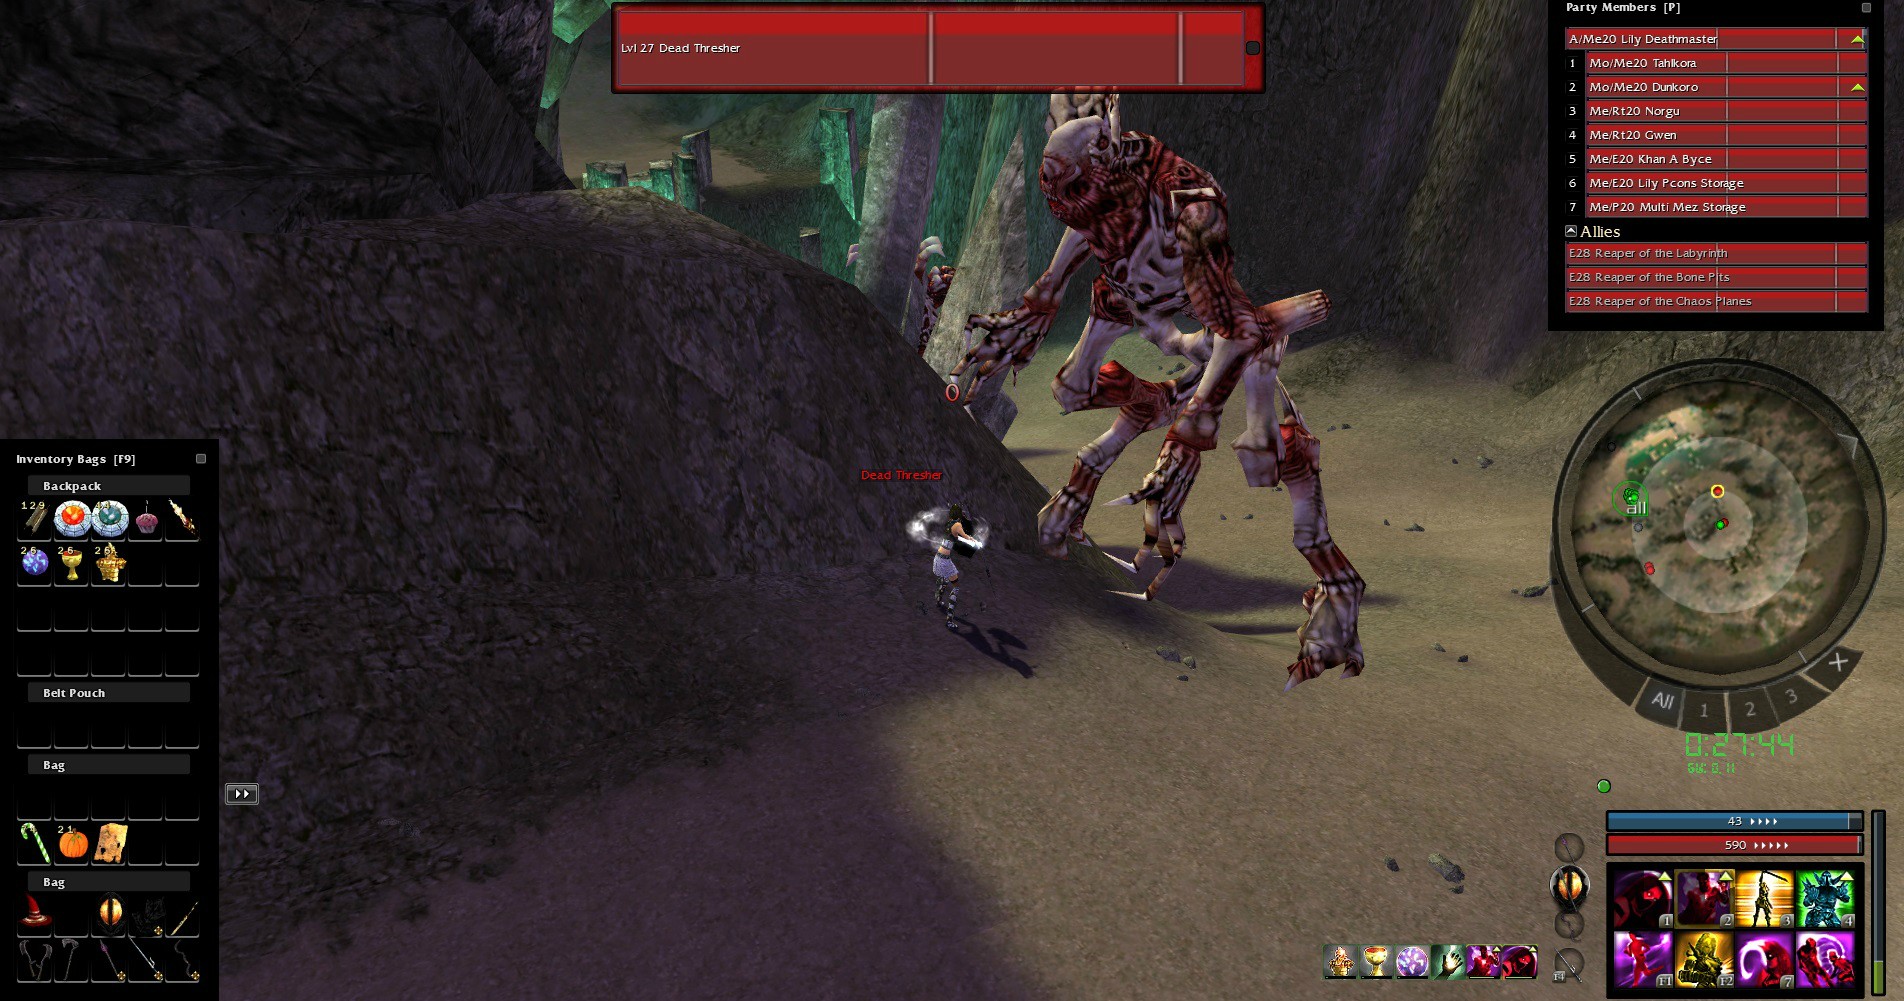 When you're done with backside, usually you'll got a fresh whirling, just put SoH near center, run sideway to the top and break it. Then kill the first soul. (If you had to put a second whirling don't do the SoH pull) Then come help your T4 at center (give him honor) then go to plains (HoS off skeles) or just DC down then HoS at this spot: 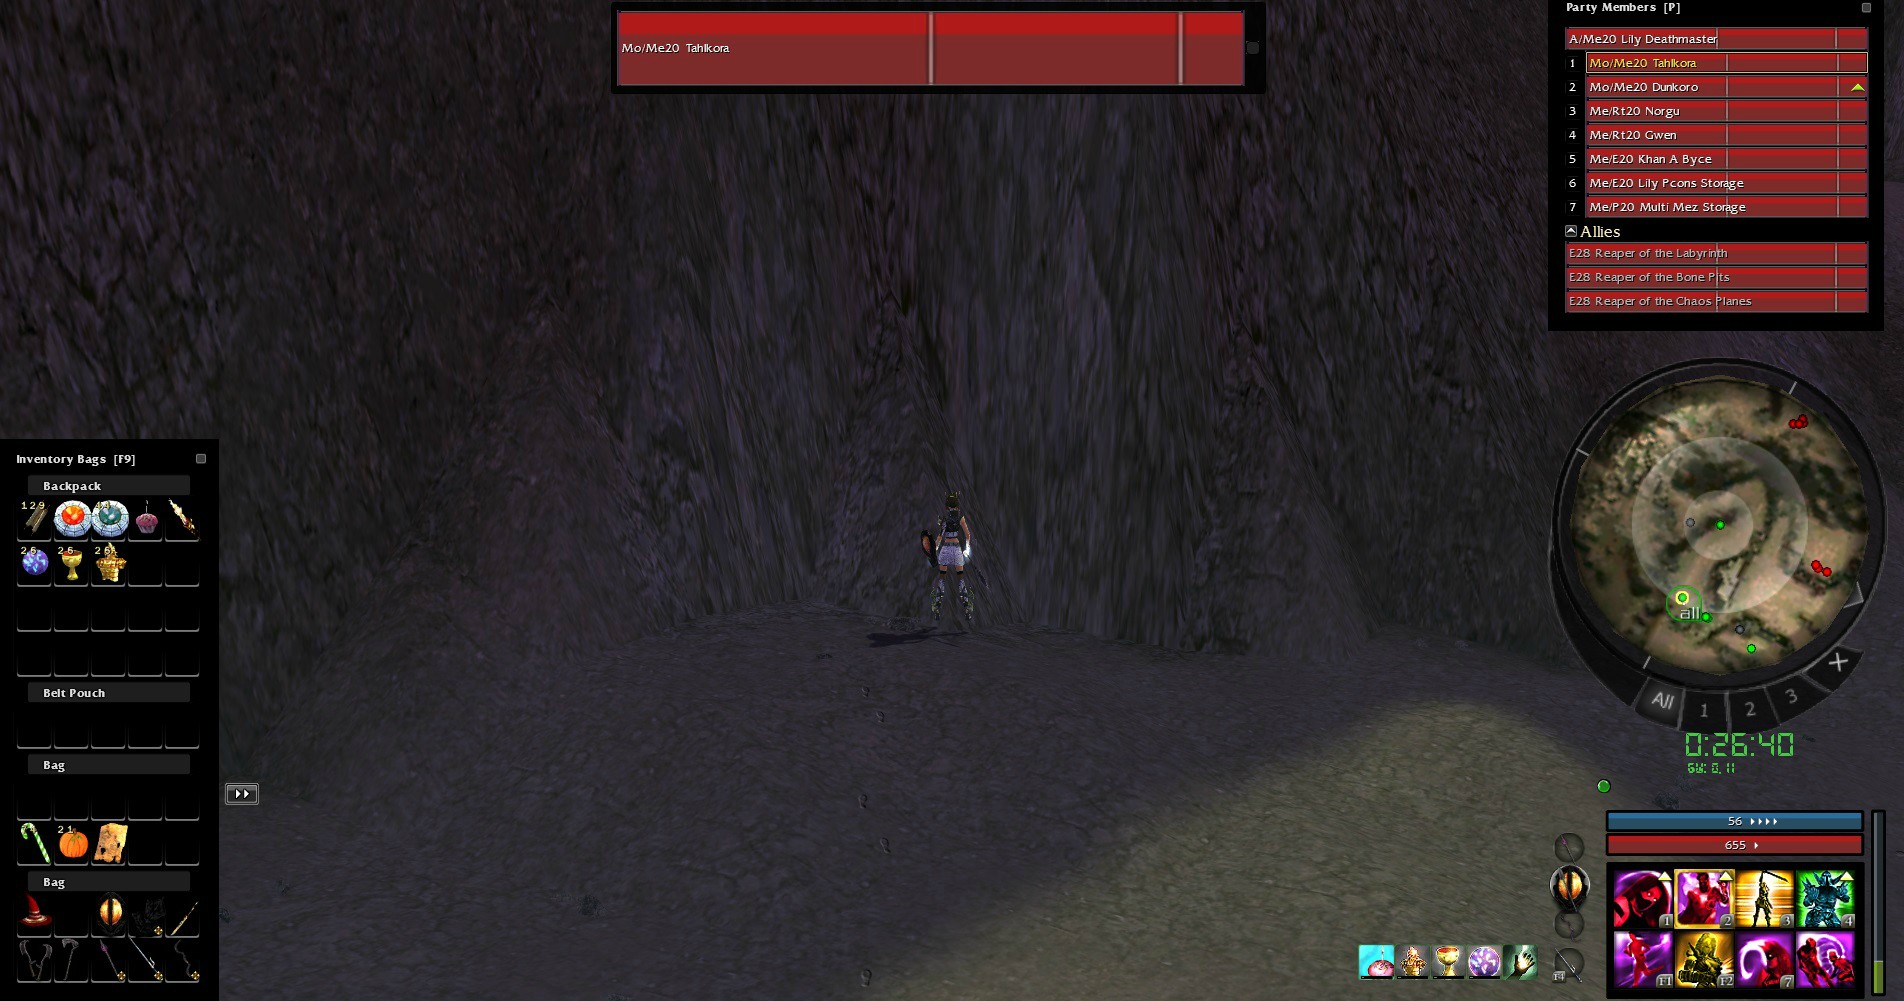 Plains: Just put SoH at pitside and run through dryders and rider to pop mindblades then break SoH. After that, help the T4 to kill the skele then go in the spot for the semi glitch. HOW TO SEMI GLITCH : The spot is exactly here :  There is a video from kaspar on how to do it : https://www.youtube.com/watch?v=oVC-rQbhZZI For 4h, there is many differents pull but imo this one is the best : https://www.youtube.com/watch?v=lvoVpzQoy_s d) Tips : Here is many videos on how to T3 by Kaspar : https://www.youtube.com/watch?v=PgEVgsC0bRk https://www.youtube.com/watch?v=KBX5F3tX6nw Here how to do pits prep : https://www.youtube.com/watch?v=7azL7_kaYss https://www.youtube.com/watch?v=Dw7mpUBzBzw https://www.youtube.com/watch?v=ZZdgAbM5OEo Special credits to Pallo for the original T3 tutorial and Kaspar for the videos. III - T2 :
a) BARS :
 b) Weapons and armors : As T2 is use 2 differents armors : Full energy armor with blessed insignia for mountains. Full life armor with blessed insignia for the queen (usefull if u play with viper defense). And I use : Full energy staff (+5 we, +5 and 20% enchant) Caster spear Zealous spear (+5 energy, zelous, 20% enchant) for the queen. Zealous Scythe (+5 energy, Zealous, +20% enchant) Fire shield (+10 vs fire damages +45 we) Lightning shield (+10 vs lightning damages +45 we) Normal shield (+45 we, +10 vs piercing or -2 wE). If u run with FH or IAU, take q5 vampiric (or zealous) daggers. c) The complete run : At the beginning I don't pop pcons, in that way you'll have all your energy for mountains. I wait for the prot bond and DC to an aaxte. If you have SoH put it on the wall (in front of you) and aggro the patrill of graspings AND the aaxte (i aggro him even if he doesn't move). Break SoH, wait like 1 sec and go to the spot for spiking. When the spike is done, pop a cupcake and HoS the LT. Now i'm poping all pcons but rainbow (cause if the mainteam wipe it save expansive pcons ^^). If your SoS isn't retard you can HoS with QZ (with viper defense you can jump w/o QZ). Now i'm using stab with alcohol and I make sure i've got my Lightning shield on me (especially if you're running with viper defense). HoS on the T4 and run to the mountains spawn. Use your DC only at the corridor on the right (the suicid go to the left in that point but everybody know that ^^). When I see the lab reaper i'm using my rainbow. At this moment, you should see a Darkness patroll, put stab again and drop SF (don't forget your shroud) and run at this point to cast winno (if darknesses are still following you, just DC like we used to do before and forgot winno) Mountains pop : There is no secret to pop mountains under 4:30. You need a good start, a good spawn and some skills. I'll just try to give you tips to do it consistently... At the beginning, try keep the main ball alive (the one where is most behemots. Don't kill behemots who're behind the monument : 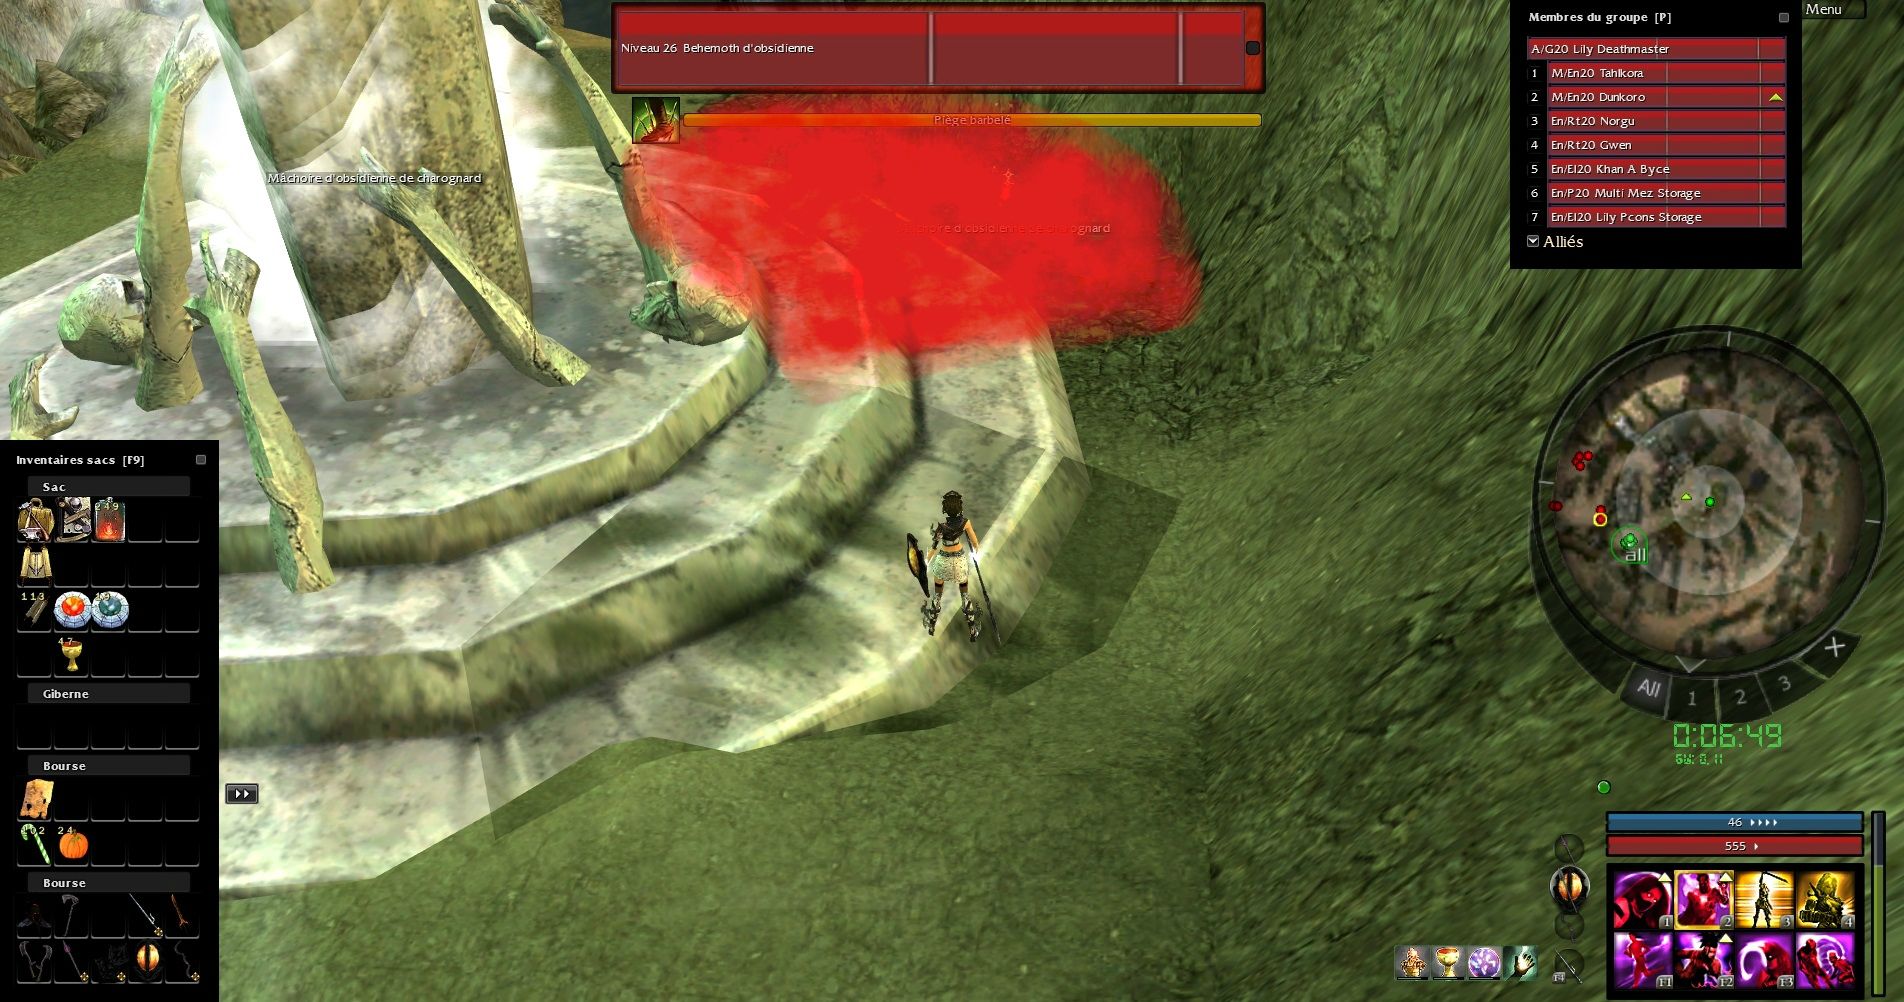 If all your behemots are at this spawn or behind the monument, just kill the 2 unglitched terrowebs. The glitched one will run into the behemot spot :  Make sure to take the quest before the reaper attack. If you didn't just tell your team and go to pools. Killing lasts behemots is way faster with the Vale team (in that case toolbox is really usefull but I only use it in speedruns or if I pop the reaper under 4min). The slayer : When your quest is taken, DC down on behemots and HoS on him to leave the mountains reaper faster : (on the screen you can see the DC target and the HoS spot) 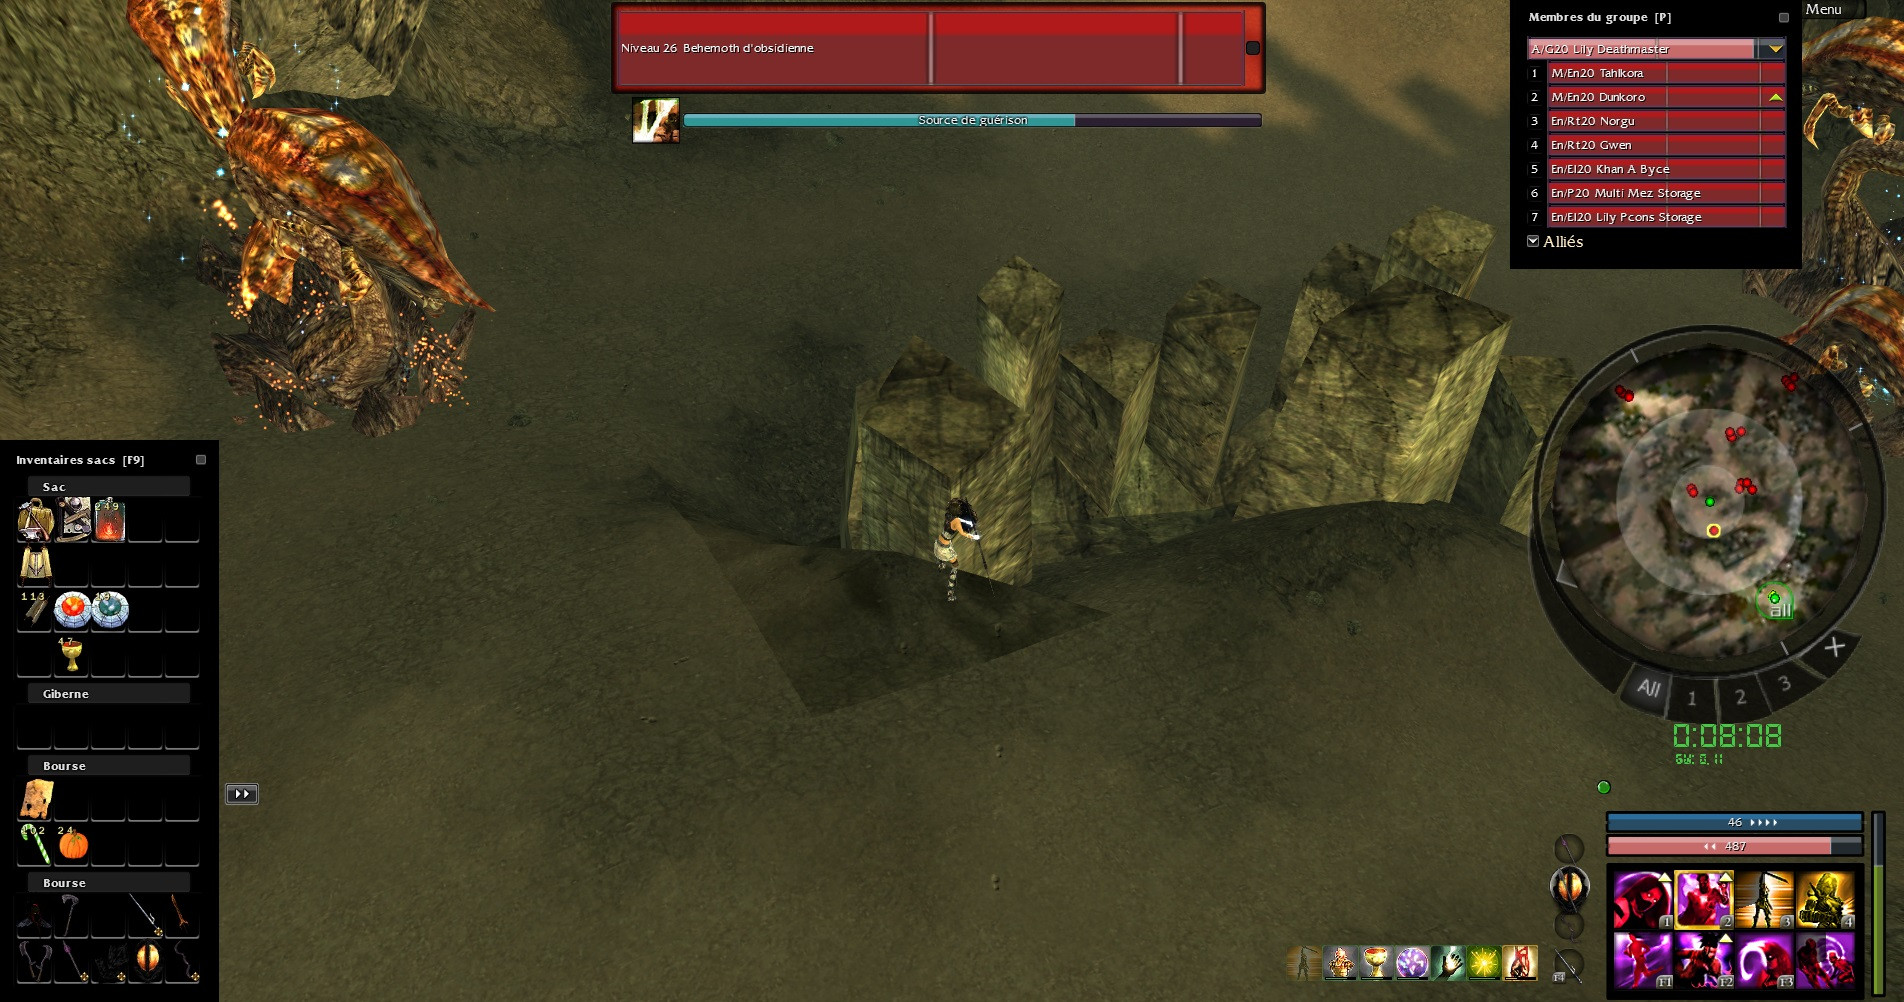 . . Pay attention if you have Darkness, put alcohol and cast stab + SF, if you don't have it just aggro the slayer and cast Whirling with stab up. To kill it there is 3 way : Safeway, go to the safespot, equip your zealous spear and your fire shield to kill him (so DC and HoS are useless). (Times : 1:40)  Fastway, go to the bridge and try to not kill white dryders use a staff for it, cast winnowing when the slayer is under 50% of his life. But pay attention, if you're running to far the slayer will say goodbye and he will kill your reaper. (Time : 1:10 – 1:20)  Stoneway, pop a ghastly stone when you're around the safe spot, aggro dryders and keepers and go to the safe spot with fire shield and zealous spear (You can stoneway only if your suicid is slow or if you poped under 3:30). (Time : 1min). Running to pools : Now slayer is done, use some alcohol and DC to the behemots to go to plains. After you've DC to the behemots you can drop SF (but equip your Lightning shield) untill here 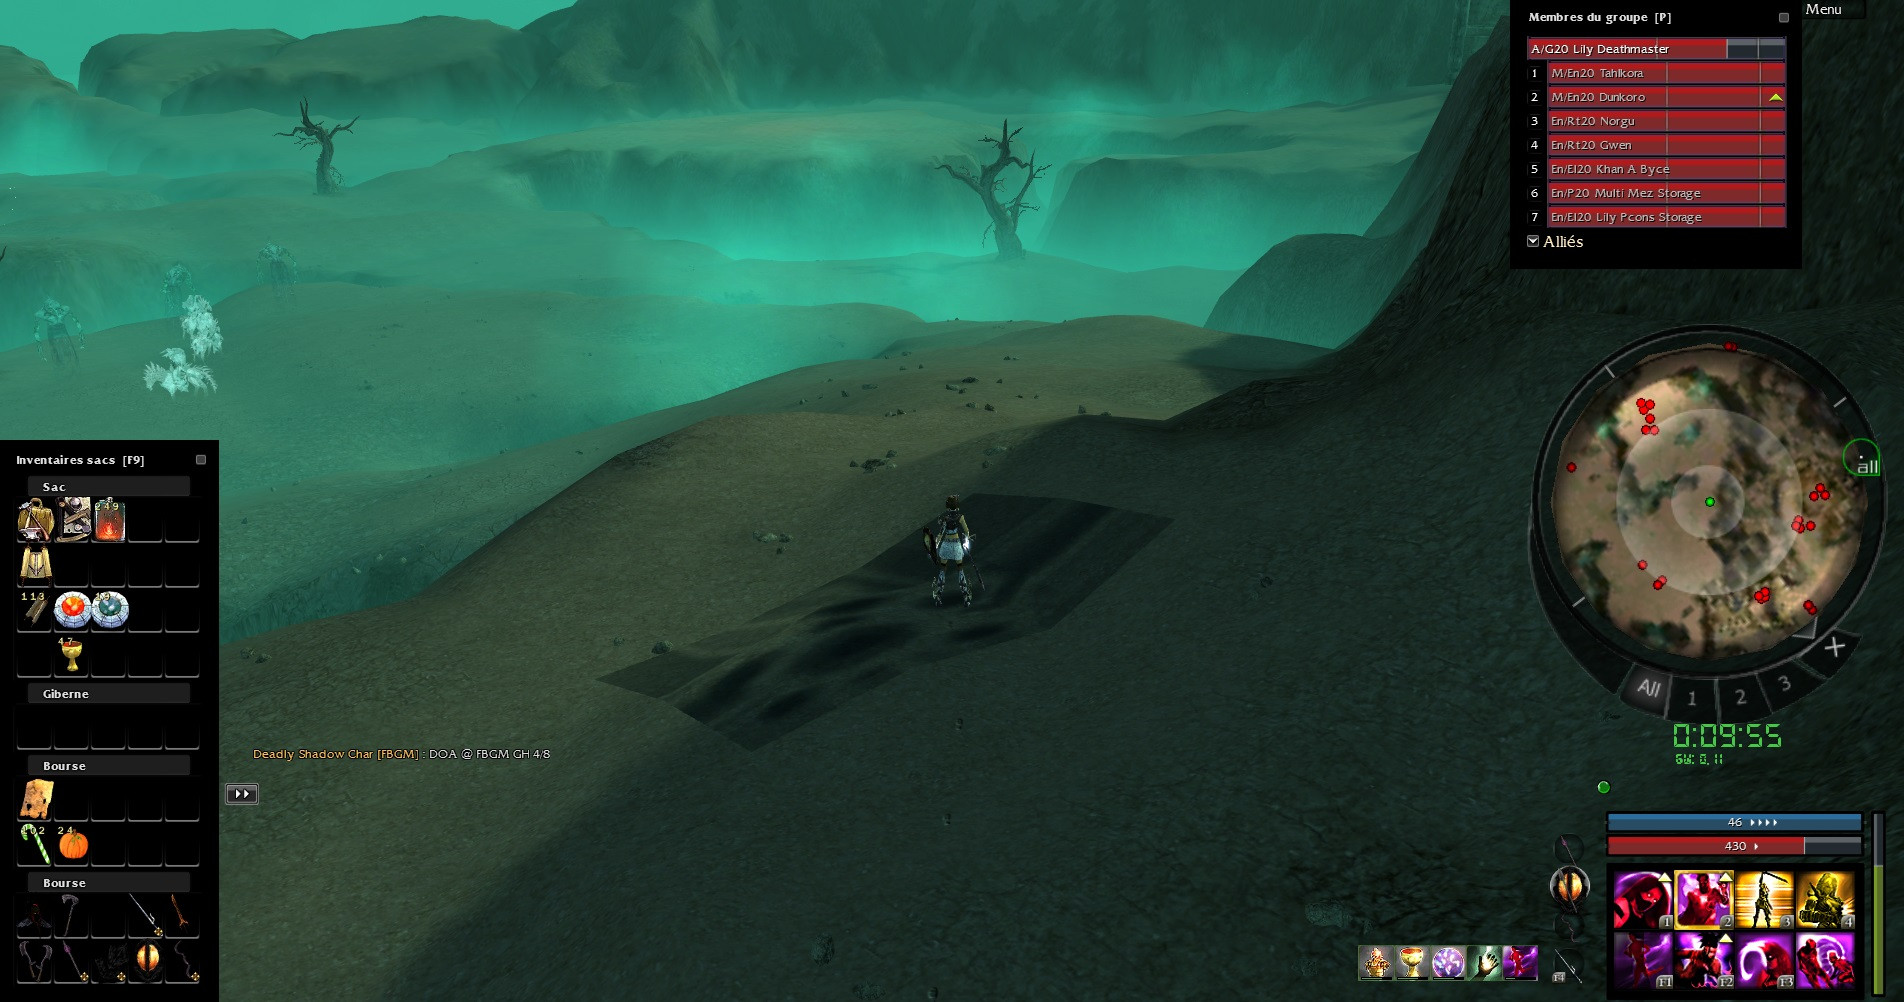 At this point I never DC to skeles because you loose too much time. I just pop the patroll by DC'ing to a rider and run. If you have put your SF at the right spot, it will be recast here 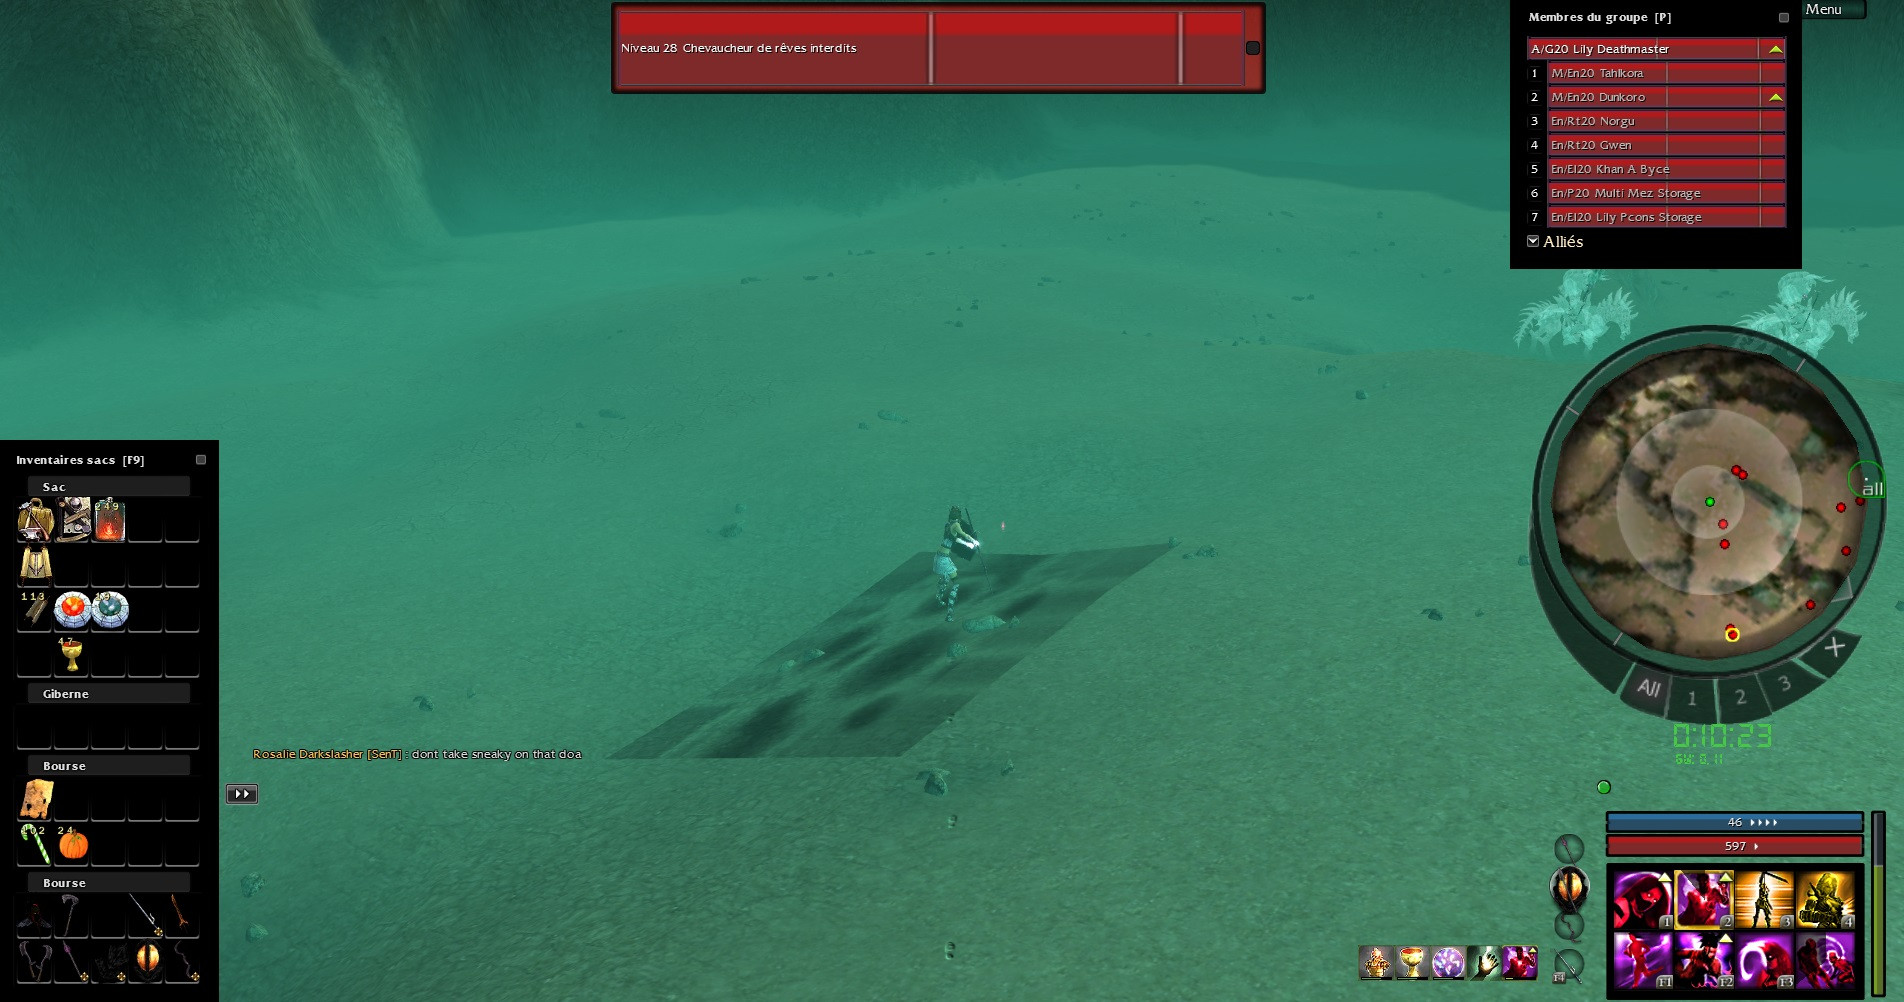 (PERFECT TIMING WOOOOT). At this time, i'm running with my staff (if you get half time recharching skills on DC it will make you happy (PERFECT TIMING WOOOOT). At this time, i'm running with my staff (if you get half time recharching skills on DC it will make you happy ) and i equip my fire armor. When you're into pools you can drop SF untill this point ) and i equip my fire armor. When you're into pools you can drop SF untill this point 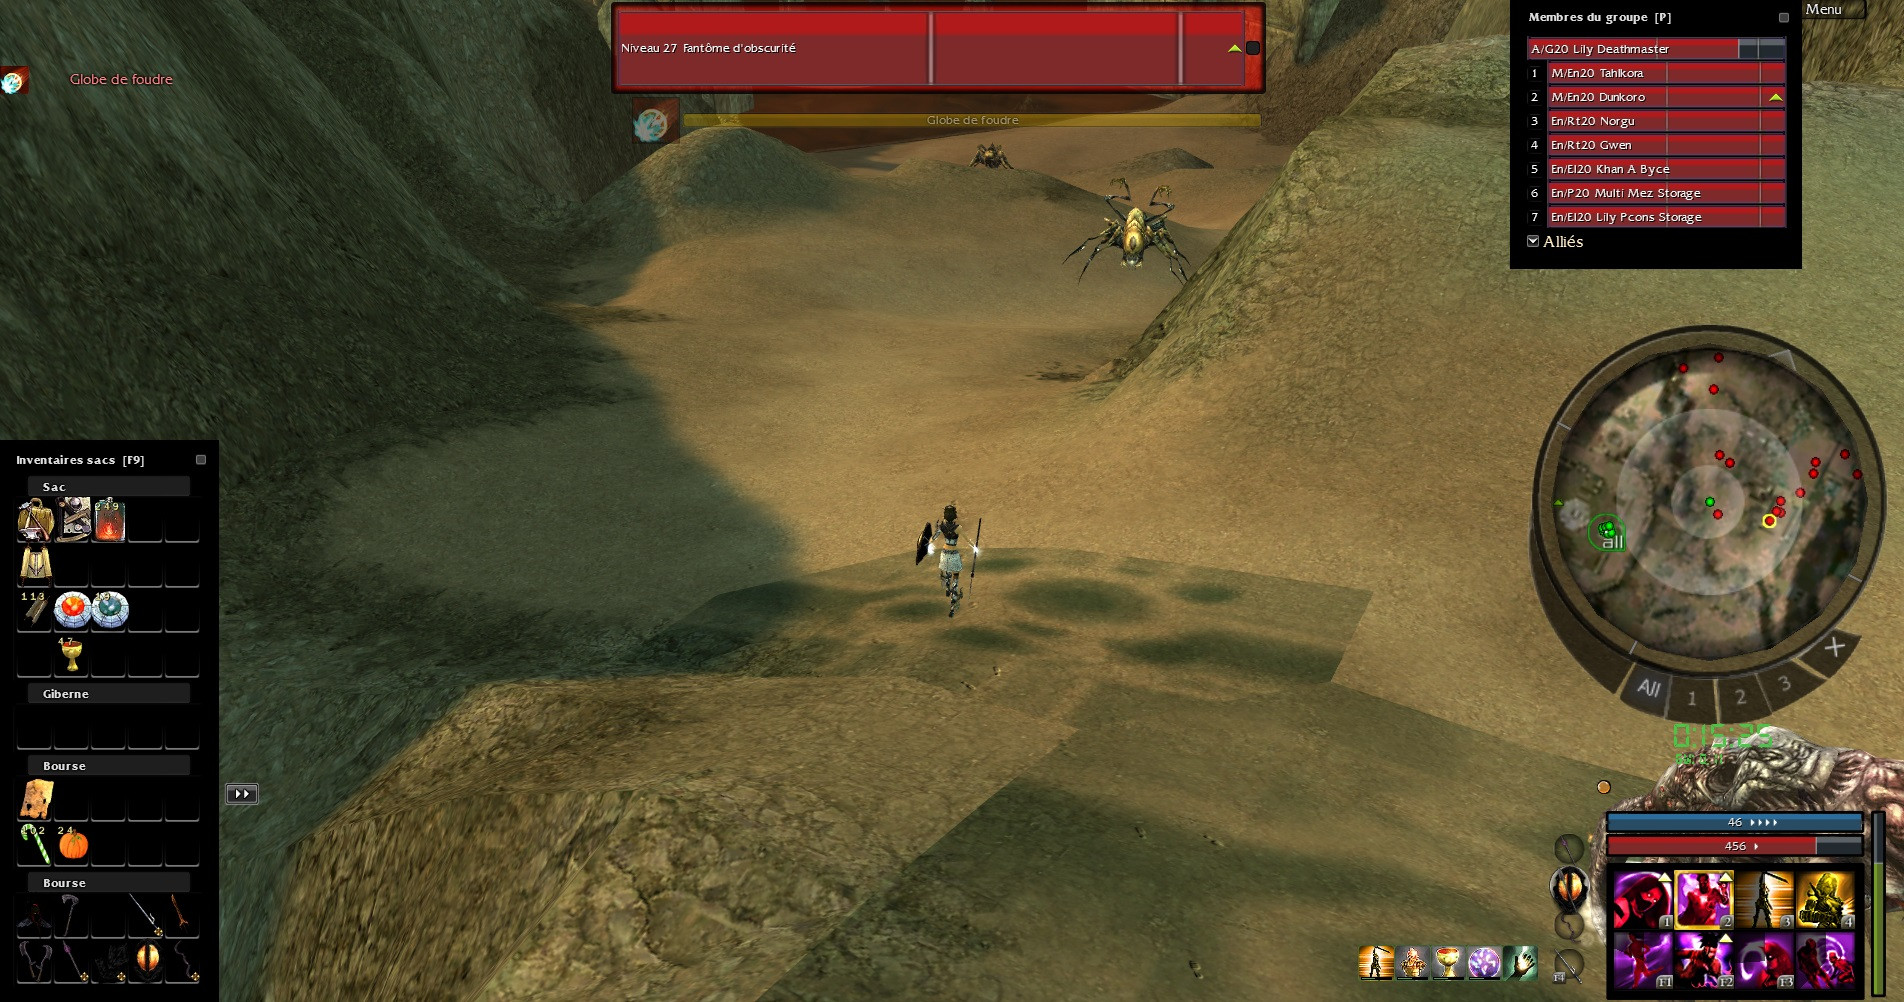 Cast stab too and HoS on a darkness at this spot  Now just run to queen's spwan by using DC and HoS and recast SF here  At this point don't use DC untill you're around pools reaper. If there's no dryders to DC on just take the 3 dryders in front of the spawn and HoS to get in. Balling pools : Ghosts are awesome ! (Video incoming) Queen : When your ball is down, check your timer and pop pcons again if you poped after 9:30 (if you don't have a timer just pop pcons lololol) equip your life armor with your staff and run to the queen (don't use DC on the queen, skeles will probably follow you) and attack the queen. Switch to your Zealous Spear + Fire shield when your life is under 50%. the prepare the /age to see if you're faster  . .d) TIPS : Using viper defense is harder than HoS. T2's who play with VD can't do queen if they have one skel (or you'll loose 20sec ^^). I'm playing with viper only for pushing time. Use +10% moral boost, you will never need a pstone so use it at the beginning. In casual, I recommand using IAU and Viper (safe and still fast), just need a rock for pools (and mnts because casting is RED ENGINE GORED ENGINE GORED ENGINE GORED ENGINE GOing slow). https://www.youtube.com/watch?v=_Ciw...qT35kZ3nS6BKWA IV - T1 :
The whole map :
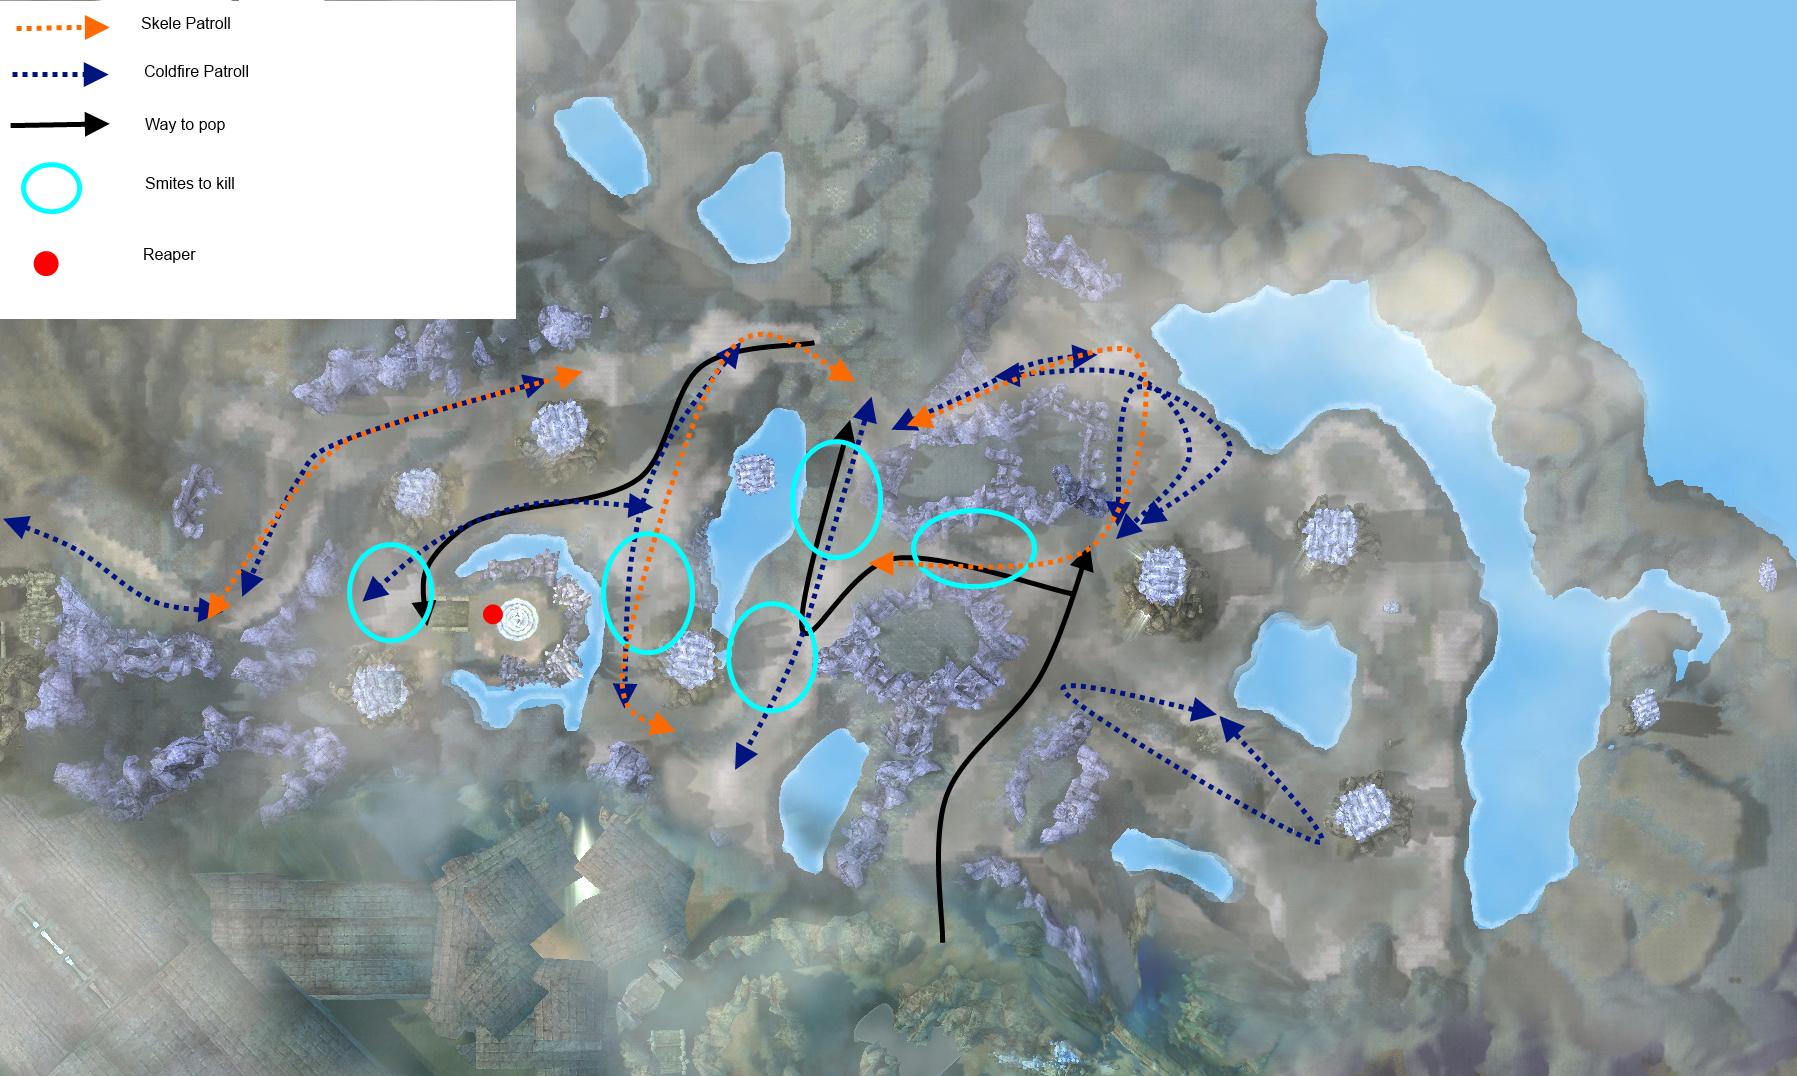 a) BARS : 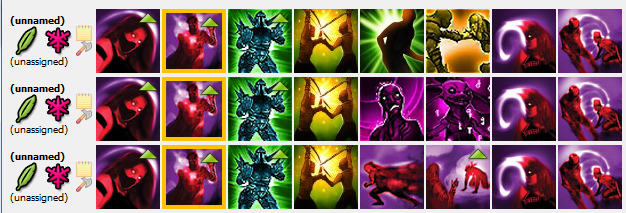 I will just explain the first bar, the second is only for poping faster but stone is needed for quest and the 3rd is for « shitty hanky's tactics » so i never used it. Template : OgcUcZsklPTHQ6M3lCHPHxkIQ4OA b) Weapons and armor : As T1, I use one armor and 2 heapieces (can use 3). Full life armor (with blessed insignia) +1 +3 Expertise +1 +3 Wilderness survival +1 +3 Marksmanship (I'll explain it later). And for the weapons : Caster weapon (+5 energy, 20% enchant) Shield +10 vs cold damages, +45 hp wE Shield +10 vs piercing (or -2 wE), +45 wE Caster staff (+5 energy, +5 energy wE, +20% enchant) Vampiric Wintergreen bow (damages +15% wE, Vampiric, +20% enchant) or a classic q9 vampiric longbow (switch in Marksmanship headpiece for more damages). c) The complete run : 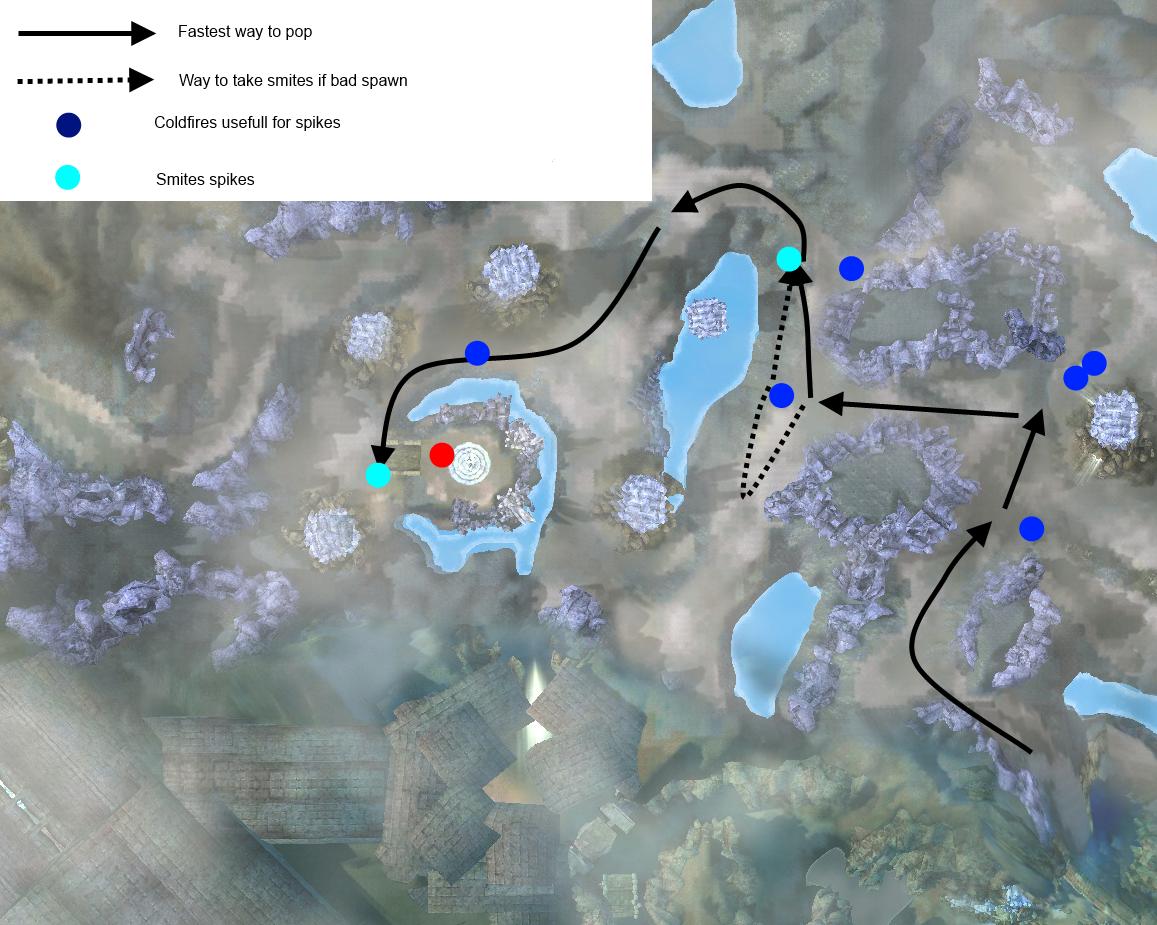 When you enter in Underworld, pop all your pcons (+10% morale boost aswell because you'll never need a powerstone) and cast shroud and stability only when the LT and the T2 are near the first ball spot. Run to the door and cast SF when it's open (cast it before if you see a nightmare poping). Do the wastes pull (usually, I cast DC only under QZ). When you're in wastes, use DC on the first smites group (you can HoS too) then take aggro of the first coldfire patroll (if you can't take them it doesn't really matter) and go to the spot to bow the 2 coldfires patroll : 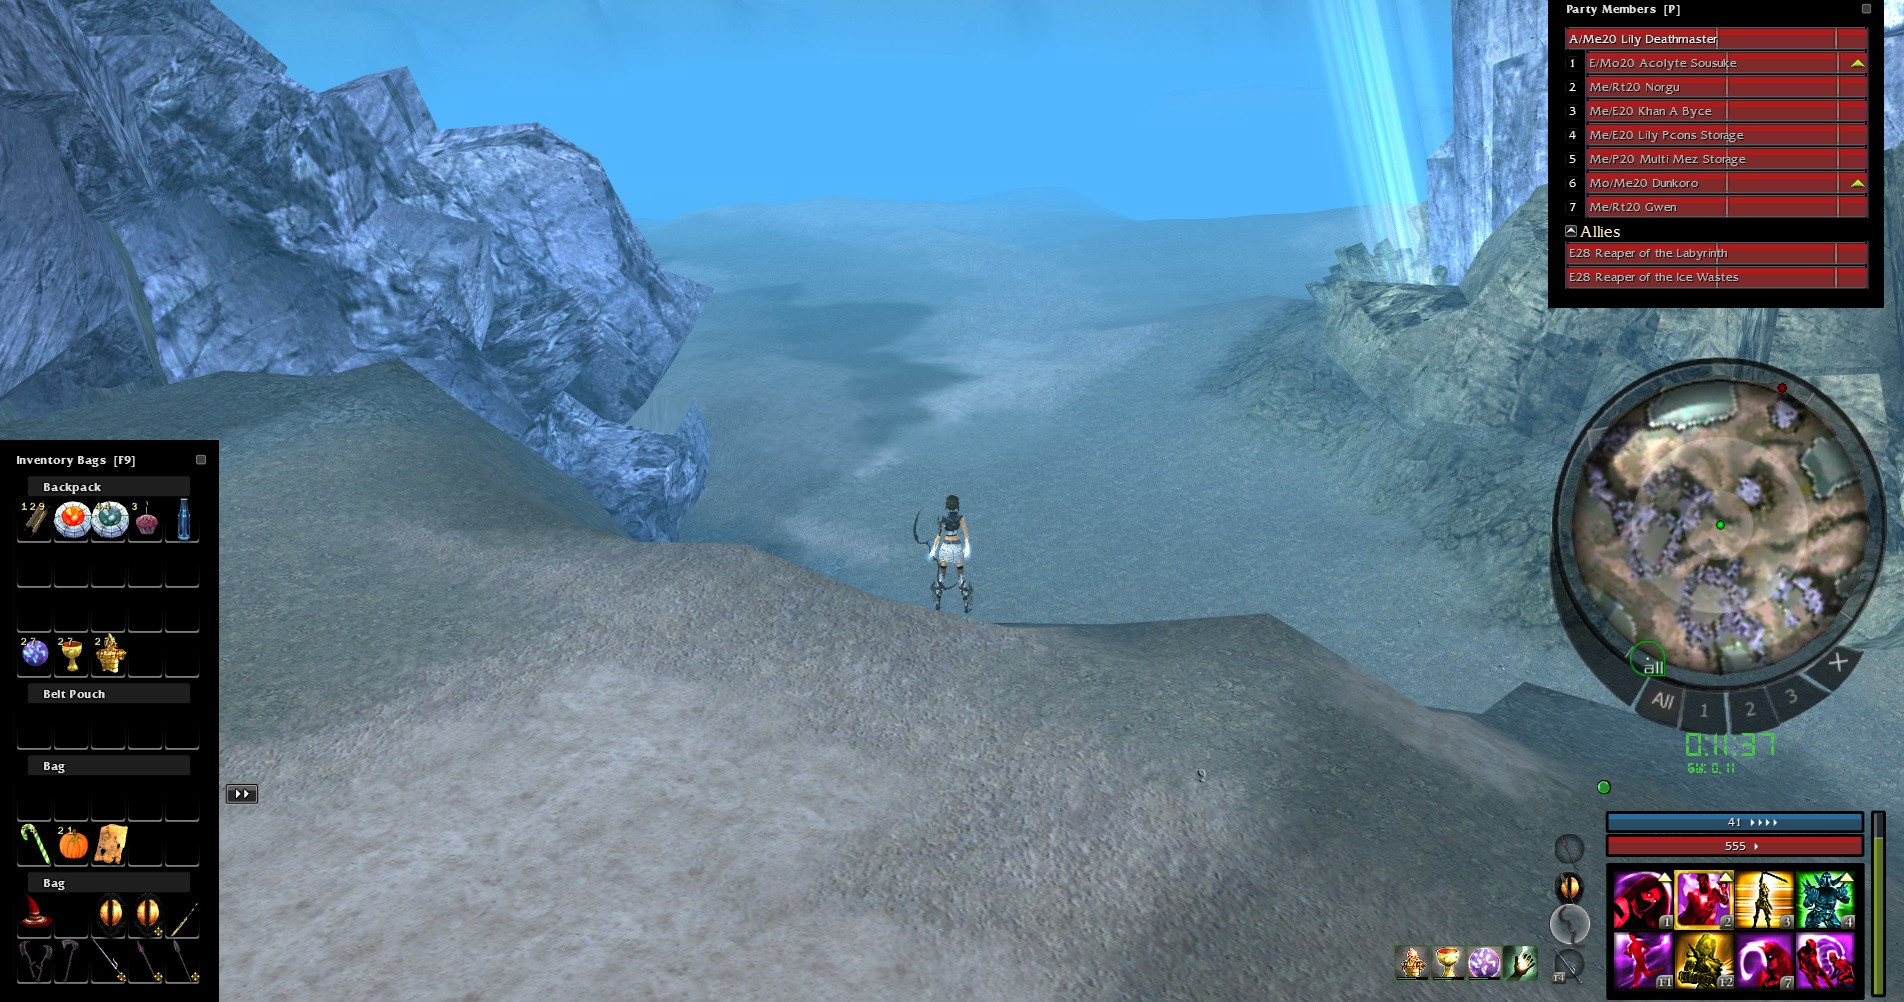 Now, run to the king spawn location then sidewalk to the spot to kill all smites (Cast winnowing when they got 50% of their life for faster spike) : 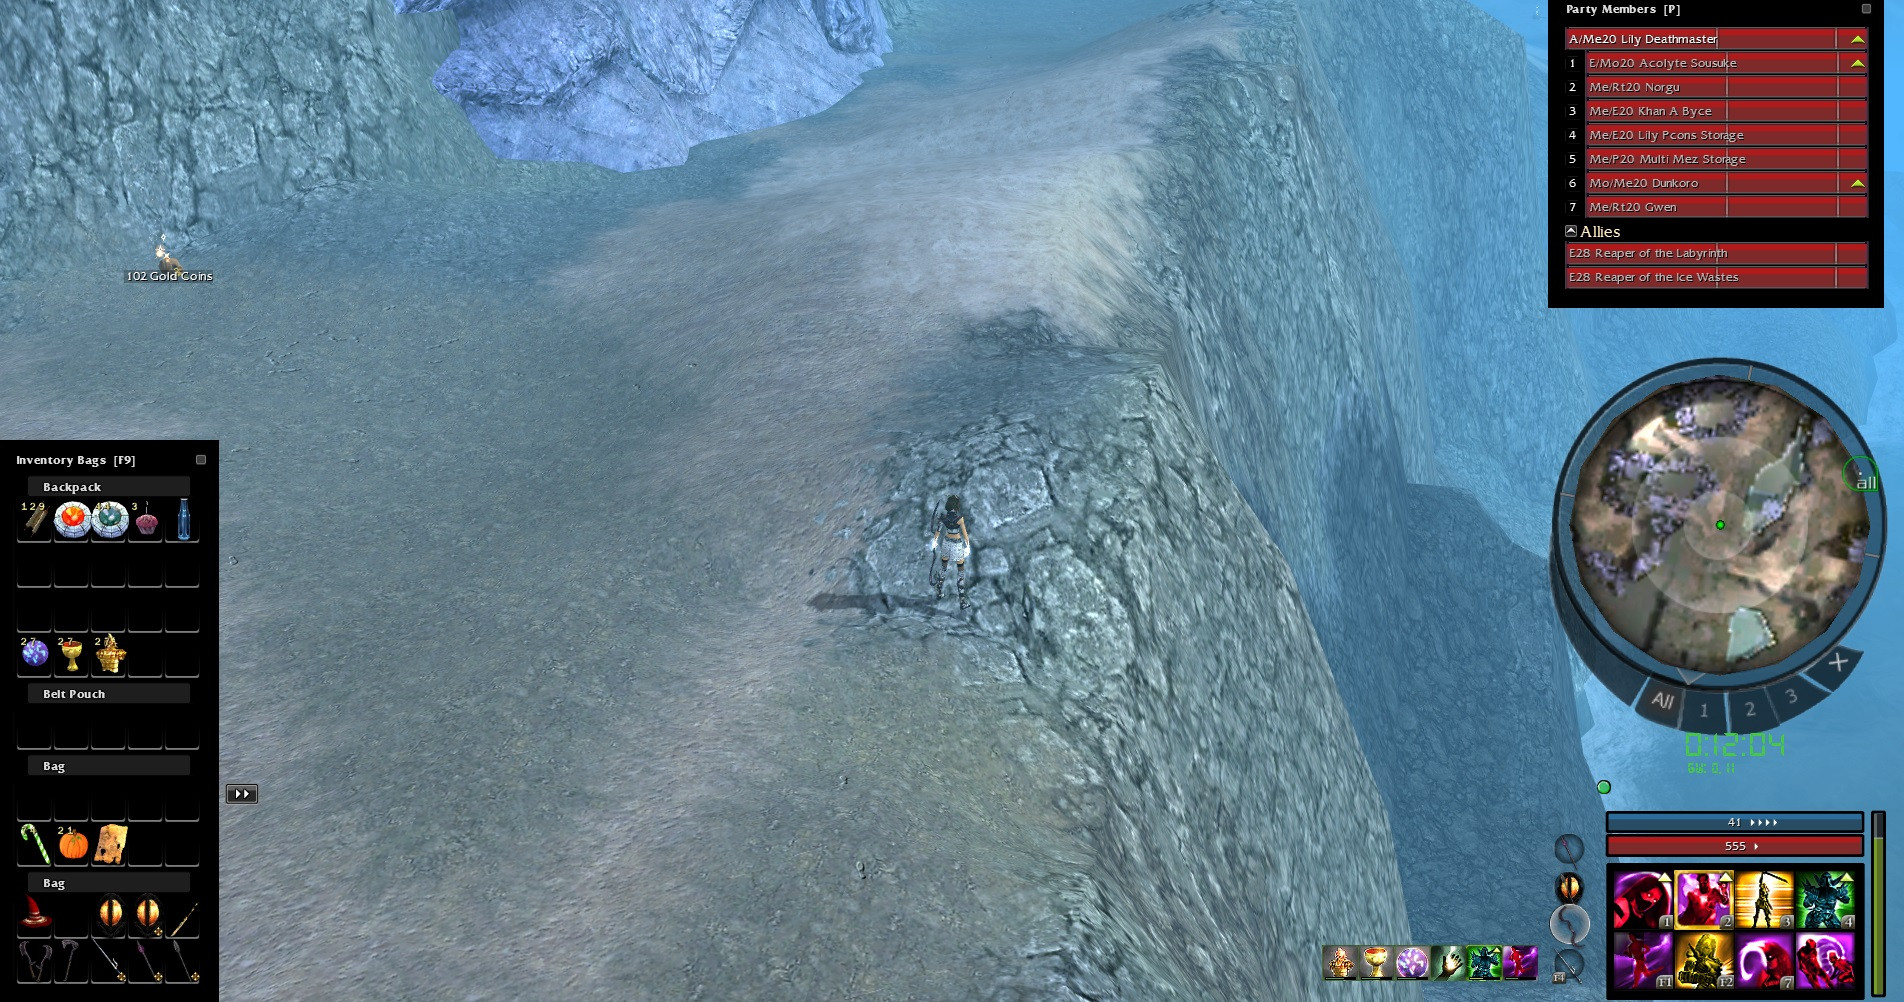 Now run to the center (where dryders spawn during quest) and kill the skeleton. Once the skeleton is dead, sidewalk to the monument to make sure no coldfires will glitch and smites will follow you. Kill smites (don't cast winnowing here) and one dryder if the buggy one didn't come on you during smites spike (having the buggy dryder on you during the spike will make it faster because he casts lava font which trigger reversal fortune) : 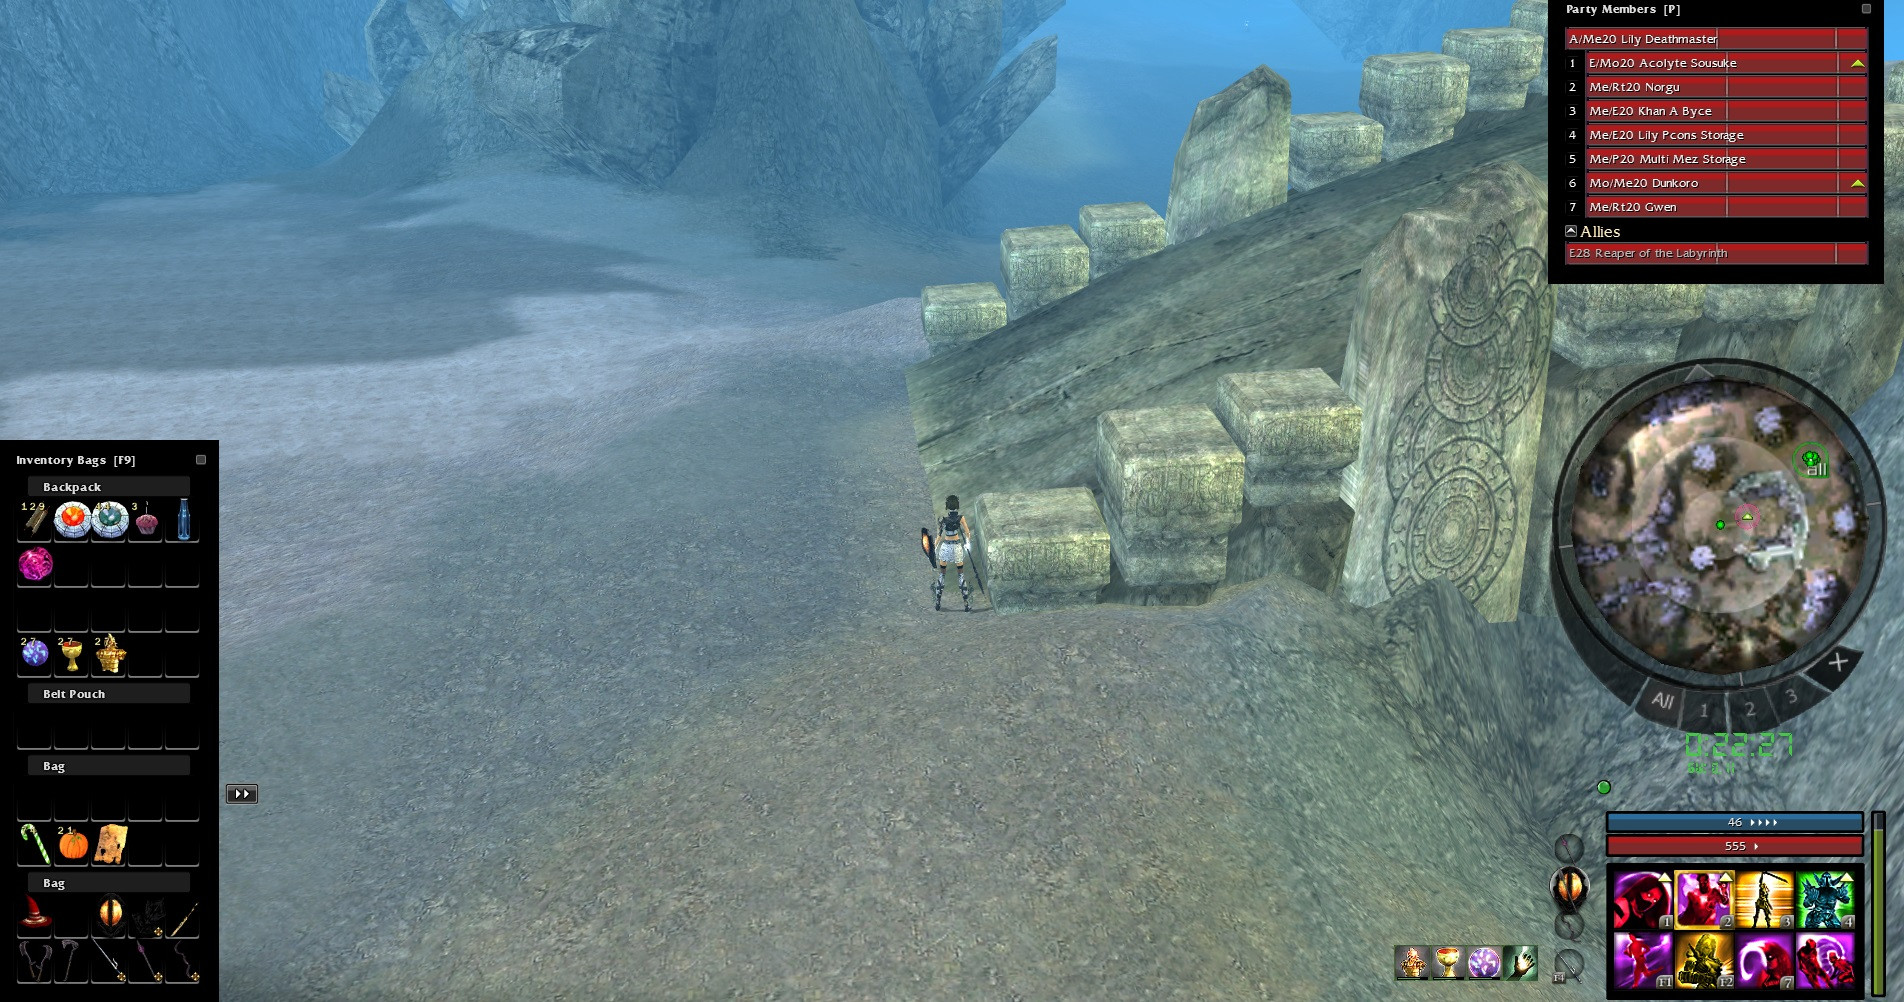 Then ball all dryders in the coldfire ball, cast winnowing (switch to Wilderness Survival headpiece) and DC in the ball. Switch to your cold set when your life is under 50% only. When your ball is dead, watch if there is a coldfire near king spawn location (even if there is a coldfire you can do the quest but you just need to take it when the coldfire run away from the spawn). If you're winnowing got killed by anything or if it will die soon, just recast it (using wilderness survival headpiece is useless at this moment). The quest : Here are the 3 first spawn :  Equip your bow and take the quest, bow a dryder and cast all your enchantments :  Then DC down in a dryder. When u have dc'ed, don't run, you can sidewalk a bit but if you run dryders will spamm lavafont. When the Skeleton pop, kill him (attack with your bow, switch to your markmanship headpiece if you don't have a wintergreen one and make sure you bow all dryders who're not in your aggro buble), then select any dryder to HoS on it and go kill the second skele. Usually, the 3rd skele will pop before the 2nd skele is dead and there is a dryder a bit away from the skele that you should bow (especially if you want to do 6min). When the 2nd skele is dead, I use to stay at the center and dodge all skele attacks. When the last dryder group is here, I run a bit and DC in the skele to kill it. Now make sure all dryders are attacking you and do the path (no need explanations for it). d) Tips : If the first skele did some crazy bullshit (like run away from you) just pop a stone. If there is a coldfire who's coming after you killed the « Popping ball » it's probably because you did something wrong. If you have a survivor coldfire during the « poping ball » just drop your shadow form and pull it to the reaper (use dagger or your bow) he will use all his energy in you so the reaper will kill it. If your suicid is slow or if you're fast then just pop a stone. If there is a glitched coldfire near the « poping ball » you should kill it. If you've let pass too many dryders on king spawn, don't do the path, just assist the king. During all the pop you should run with a staff, rangers block more if they're under 50% health so they deal more damages, use a shield only if you have too many smites or if you're about to die. For the path, you can kill smites and coldfire at the same time because of the number or dryders. It is important to remember that the breaking point for coldfires is directly related to the aggro point https://www.youtube.com/watch?v=8r-C...qT35kZ3nS6BKWA V - Spiker :
So, here's how to spike in UW like a baws. This will require you to change headpieces, use several runes so you'll have low hp and you'll need full pcons. If you don't feel like switching headpieces or you're being cheap and don't pop eggs, certain things will not apply to you. Also, it may seem I will go too much into depth in some things that don't seem relevant, but it's exactly those things that will make your spikes stronger.
a) BAR :  Template: OQJVAuAJ4xZRqlhu0G8mSGQDA6QEAA. Skills are pretty much set. However, it seems everyone uses different set of attribute points. I think mine is best and here's why. Domination 12: doh.... Inspiration 7: You cast Lyssa's Aura on a couple of times in a run so you can easily swap headpieces while casting it without being troubled too much. 7 + 4 + 3 from pcons is 14 Inspiration. At 13 Inspiration Magic, Lyssa's Aura will give +4 Energy Regen, at 14, it will give 5, which is pretty sweet. Fast Casting 7: With a total of 13 Fast Casting, Wastrel's Demise will recharge just as fast as Wastrel's Worry, which is really nice for lab/chamber spikes and escort spikes. In the spoiler, there's an explanation why the 13FC is crucial, if you don't care, just assume I'm right. Recharge times of any skill in Guild Wars are rounded off to whole seconds and fast casting is unaffected by the effect stacking cap. Essence of Celerity reduces recharge times by 20%. So you have only 80% recharge time. Fast Casting at 13 reduces it by another 39%. So you have only 61% recharge time. Recharge time on Wastrel's Demise is 3 seconds. 3 seconds * 0.8 * 0.61 = 1.464 seconds. The game rounds this off to 1 second. Fast Casting at 12 reduces recharge time by 36%. So you have only 64% recharge time. 3 seconds * 0.8 * 0.64 = 1.536. The game rounds this off to 2 seconds. So 13FC is the magic number you want to have. Beast Mastery 8: There's not much to say here. There's a lot of Graspings on the first spike to get many triggers on EoE so you don't need that strong Beast Mastery. The second spike contains fewer Graspings so your lvl is pretty relevant. EoE usually doesn't kill everything but it takes like one second to finish off the Aatxes. Illusion Magic 4: The rest goes in here. At 8 Illusion Magic, you'll have a 7 second Visage, at 9 Illusion Magic you'll have 8 seconds, 10 Illusion still 8 seconds. With pcons, a Major Rune + Pcons will bring it to 9. b) Weapons and armor : Armor: +4 Domination Magic Headpiece, +4 Inspiration Magic Headpiece, +3 Fast Casting on any armor, +2 Illusion Magic. Full radiant Insignia. Weapons: An enchanted weapon is really nice for Visage and for Lyssa's Aura between spikes in Vale. I use a 20/20 offhand for Empathy. If you can be bothered, you can swap to 40/40 set while fighting Skeles. c) The Complete run : First spike, in chamber, pretty straight forward. Watch your SoS, as soon as he starts activating, you drop down EoE, left of the top of the stairs so it's in range of the nightmares on the LT's side. Before putting it down, switch to Inspiration Magic headpiece. As soon as EoE is dropped, use Lyssa's Aura. Then target the LT and use Visage on him. Whilst you're running to the LT, you switch to Domination Headpiece. Then just use Wastrel's Worry and Wastrel's Demise on the ball. After three sets of each set of Wastrel's, use CoP. Or if you think stuff is gonna break, use Cry of Pain right before you expect stuff to run away. Second spike, in lab, drop EoE as soon as you can. Switch to Inspiration Headpiece, use Lyssa's Aura, switch to Domination Headpiece. And start spike: 1) Visage on LT 2) Target nearest enemy (default key is C). 3) Wastrel's Demise, Wastrel's Worry 4) Target next enemy (default key is Tab). 5) Wastrel's Demise, Wastrel's Worry 6) Target next enemy 7) Wastrel's Demise, Wastrel's Worry 8) Manually target a Bladed Aatxe (you do this because Graspings Will die soon, but EoE will not kill the Aatxes) 9) Manually target attacking Dryders and spam Wastrel's on them, rupt something with Cry of Pain to do damage but also to keep Wastrel's up. First escort spike: This is where things get tricky to understand. There's a way to easily and consistently target both Aatxes and also hard to explain so bear with me. Default keys: C = target nearest enemy Tab = select the 'next target' Shift Tab = select the 'previous target' First some game mechanics. When you hit C, you will target the nearest enemy and to make things easy to explain, we'll say the game assigns a number to that target, which will be number 1. When you hit Tab, the game will look for the next nearest enemy without a number and it will assign number 2, etc etc. As long as you keep tabbing and shift tabbing, these numbers will remain unchanged and you will go from 1 to 2, to 3. And shift tab will go from 3 to 2 to 1. These numbers will reset if you hit C again or if you click on an enemy with your mouse. What I do is I hit C at the moment the Aatxes are the nearest enemy and quickly use Tab. What this does is basically assign the numbers 1 and 2 to the two Aatxes. From this moment on, do NOT use C and do NOT click on enemies. You do this while the LT is doing the pull. That way, when the pullthrough is done, you'll have one dot, but you can still easily Tab and Shift Tab the two Aatxes. In this screenshot you can see the timing where you can hit C and tab to assign the numbers 1 and 2 to the Aatxes:  1) Switch to Inspiration Headpiece after you take Escort/Restore. 2) Cast Lyssa's Aura and switch back to Domination Headpiece. 3) Cast Visage on LT as he runs in 4) C and then Tab to assign the numbers 1 and 2 to the Aatxes. 5) Shift Tab to go back to Aatxe 1 6) When the LT starts pulling through, Wastrel's Demise/Worry 7) Tab to select Aatxe 2 8) Wastrel's Demise/Worry followed by Cry of Pain on Aatxe 2 9) Shift Tab to go back to back to Aatxe 1 10) Wastrel's Demise/Worry 11) Tab to select Aatxe 2 12) Wastrel's Demise/Worry followed by Cry of Pain on Aatxe 2 and then ping the Aatxe 13) Visage on LT again 14) If spike isn't done, another Wastrel's Demise/Worry on your pinged target. You can start putting Wastrel's on the Aatxe as the LT starts pulling through the spirits/SoS. Second escort spike: Basically same thing as the previous spike. However, since there are more Mindblades here, you can start spiking earlier. Mindblades don't have to die that evenly since the EoE bomb will be bigger than the first spike. I usually start spiking about half second before the SoS uses Signet. Vale Skeles: Not much interesting stuff to say. Just some quick notes (some quite obvious but w/e): 1) Use Empathy on recharge. 2) Use Cry of Pain on Skeles that are balled 3) Don't use Wastrel's Demise 4) Use Wastrel's Worry right after Bone Spike that has been used after a Fury Splinters 5) As you're killing the group of Skeles, walk towards the lonely Skele that the LT should be about to aggro but make sure to use Empathy on recharge. 6) If mainteam is weak, hide behind house. Dropping EoE: I drop EoE in range of topgroup. That way top will be faster. Downside of this is that it can be killed. 1) Right before you drop EoE, use a Wastrel on the lonely Skele, not for damage but to refresh Lyssa's Aura. 2) Activate EoE 3) EE to SoS 4) Visage on LT 5) Use 3 sets of Wastrel's on the Graspings (3x WW, 3x WD). 6) Start using Wastrel's + CoP on the attacking Dryders. Graspings are not dead yet but they will die. If you do this fast enough, you won't lose Lyssa's Aura. Vale quest. This is easy, not gonna write too much about it, just some quick notes. 1) Kill buggy group first 2) Use Cry of Pain only when a new group spawns to ensure getting the most damage out of the degen. 3) Every time a new group spawns on the emo, throw some Wastrels on the 2nd wave of the buggy spawn so EoE will do work there as well. 4) Let the SoS do garden pulls, you're damaging the buggy group while he/she does that. 5) Near the end of the Vale quest, your energy should be gone. If it's not, it means you don't spike hard enough. Switch to high energy set for an extra 30 energy. That's it. ~Hydro VI - SoS :
a) BARS :
 Template : OAKjgliJJTXTOOPH5iIHbHyl0lA I'm always using the second bar for attributes. You'll get perma QZ at dhuum so it will be a bit faster. Spikes don't need you to be really strong because the mesmer is supposed to deal enough damages. If you're weak (and your spiker too), take the first bar. b) Weapons and armor : Armor full energy. +1 +3 Channeling headpiece +1 +3 Spawning power headpiece (for dhuum) A 40/40 set (canalisation) Zealous scythe of enchanting A caster staff (+5 energy, +5 energy^50, 20% enchant) High energy set. (or atleast a focus with live for today) c) The Complete run : Pop all your pcons and cast a QZ (with Serpent) when the LT is near the stairs (around the first ball spot) and spike (use Arage if you have it on the LT) then EE the LT and spike the skele (you can spike the 2nd skele aswell). For the second spike, cast honor before and use the rift on dryders, the spiker can spike the ball w/o your help. Usually, there will be a dryder left, just rush on him and cast PI (he will die in few seconds) and take Escort and Restor. For escort, use Serpent and block the enemies (put spirits one step behind the LT). If you get rupted, just tell your Emo and stand untill the LT is back, otherwise, EE the LT and start to spike (use rift on mindblades who are not in the ball). After, EE the LT and spike the skele from the basement (if he's not dead). Do the same thing at second escort spike. In the vale, first, aggro the skeletons from the garden (try to ball them) then spike them. Usually when they're ball, I just rush into them, use SoS (with serpent) and aggro the patrolling skele. When they're all dead, spike dryders (no need to spike graspings with the spiker). After that, take the Wrathful Spirits and go kill the top group with the LT. During Vale, switch to your zealous scythe and put honor to spike spirits. Don't forget to EE the LT for your life. For the Garden pull, put SoS before (use serpent) and aggro all of them (move backward) then spike them. When you have done all pulls, kill the lasts buggy spirits (use honor for safe soul) then do the basement keeper (no need explanations for it). Dhuum : This is the most important part, at dhuum, you are the most important person. Switch to your dhuum set, your Spawning power headpiece and tell the Emo that you need a BS (if it's 7men rest, enjoy the energy rape). With the bar i'm using, you got perma QZ. The fact is that casting QZ under the QZ costs around 33 energy. Add 13 for PI and 13 for honor and you'll see that your energy will probably be a problem. The thing is your QZ will stay alive during judgement (your winnowing aswell) so PI deals more damages and rest is a bit faster. Try to just cast QZ when it's about to die, honor when it's about to finish too and attack with your zealous spear. If you have a BS, switch to your 20/20 offhand for the last QZ (if dhuum glitch is perfect). If you don't have it, usually the 2 lasts QZ will make you switch to your high energy set (just switch for QZ then go back to your classic dhuum set). Don't cast any rifts on Dhuum, it will costs to much energy. d) TIPS : I don't have any tips, just those 3 videos https://www.youtube.com/watch?v=ygz-mmakeO8 https://www.youtube.com/watch?v=5vjzySbz9Z4 https://www.youtube.com/watch?v=ly9W...qT35kZ3nS6BKWA (Dhuum with perma QZ) VII - LT :
a) BARS :
 Template : OQdVAqwJyB955AqziAvtbqMABi7A b) Weapons and armor : I use an armor (blessed insignia) with 2 superior runes (fast cast + Inspiration). +1 +3 domination headpiece +1 +3 illusion headpiece Longbow Caster staff (+5 energy, +5 energy wE, 20% enchant) Caster weapon (spear if mesmer spike, sword or axe if necro) + shield (+5 energy, 20% enchant // +45HP wE, -2 wE or vs slashing) High energy set (Caster weapon + dom focus with « live for today ») Pcons: Cupcakes, Apples, Corn, Eggs, Pie, War Supplies, Res Scrolls c) The complete run : Introduction : When you pop a cupcake right at the beginning, you can do the chamber pull without the skeleton putting mutch stress on you because you will break it immediatly. Also you will immediatly break the skeleton up the stairs when moving on for the Lab pull. The only part where you lose a considerable ammount of time when popping a cupcake is the 2nd Escort pull. However, the time you win with simply running faster is greater than the time you lose on that 2nd escort pull. To unglitch dryders, wait untill on is attacking you, cast IoP on it and pop a ghost. Chamber : When everyone has loaded in, wait for cons to pop, pop your pcons (Also a Cupcake if you want) and stand near the Lost Soul (take the quest asap). When your emo has casted his 2nd bond on you pop Shroud, SF and Mantra and HoS up through the stairs. Pull all the agro you're supposed to agro and pull them into the normal spot. Do the off-damage on nightmares from the stairs, the T4 is supposed to do the aggro on other ones. When the spike is done, HoS up the T2 and go to the lab Lab : This is where a lot of people get stuck very often. When agroing all the agro in Lab, try to see up front when you think you're going to get stuck, and save your jumps for those occasions. There is 1 group that you must NOT agro, and that is the 2 bladeds from the basement. Often people are fooled by them standing near the lab area and thinking they must be pulled aswell. Pulling them will put more stress on the first escort spike than nececary. Remember when you have pulled all the graspings (you can let the grasping patroll from the corridor, they will never aggro the reaper unless you pull them to it) and bladeds, walk forward (sideways or backwards if you have a cupcake) into the corner after pulling the terrorwebs. When in position in the corner you will do off damage on the terrorwebs and Dying Nightmares. When the Dyings and Terrorwebs are balled up nicely focus on the Terrorwebs since they have more HP and the dyings will die when doing so. If the Dyings are spread out all across the place, keep them as priority targets. After the main spike is done, again help out on killing any survivors before moving on. Escort : As LT you are normally expected to be ready for Escort at any time. If you are for whatever reason not ready, make sure to communicate with your main team. When the quest is taken, cast a fresh Shroud and SF and pull the agro in the basement. Make sure you also agro the 2 Bladeds. You don't nececarily have to agro the Skeleton, since the main team can deal with it after the spike. So if it's far away just leave it alone. Pull forward (backwards if you got a cupcake) onto the bottom corner of the stairs for the usual fast pulls, and wait for the SoS to stand on you. As soon as the SoS stands on you, walk forward (or backward) or just HoS (You don't have to wait for the spirits to be set in place) untill halfway up the stairs. Wait a split second untill everything that pulled is balled up nicely and then run back in. If there are any mindblades outside of the ball, focus on those and try to at least get them down to under 90% HP so EoE will release hell upon them. If it's a perfect ball, pick a random mindblade in the ball, and keep refreshing your wastrels on that one. Don't spike the bladeds since your Spiker will already be spiking those, and you don't want your wastrels to overlap each other.When the main spike is done, just proceed to the second spike. When you run up the stairs, there will pop 3 mindblades on the bottom of the stairs. Wait untill they turn hostile, and than start pulling the agro up. (If you have a cupcake on do this entire pull by walking sideways). Save your HoS for when you get stuck. When you are halfway through on the bridge to Vale, another set of 3 mindblades will pop. At this point, wait a bit for the mindblades from inside vale to fully agro onto you. While waiting select a mindblade in the back to DC to once everything has pulled onto you. Now simply walk backwards, hugging the right wall untill you hit the door. Now same story as with the first spike, once the SoS stands on top of you pull backwards untill everything balls, then run back in and start spiking. Again your main priority on spikes is off-damage. If there is none then spike on a mindblade in the balll. Help out finishing off the spike and you're ready to enter Vale. Vale Pop : Before entering Vale, put up a fresh Shroud and SF. This should last you through for the entire run through Vale when pulling agro. Pop all the graspings inside Vale and make sure that they follow you. As per usual don't pop the graspings direcly to the left when entering vale, but just pull through the middle. Don't worry about agroing Skeletons. With a Cupcake up you will almost instantly break them again. Just make sure to keep moving and save your HoS in case you get stuck somewhere. Proceed through and make sure to also pop the graspings behind the derp house. After that, run up towards the terrorwebs, and put up your SF when you're close to them. Now sometimes at this point you can have a skeleton agroed onto you. If this happens just run up towards the terrorwebs a bit further so you break it. Keep an eye out for your agro though. Sometimes when running in too deep, graspings will break when running to the terrorwebs. If this happens simply run back quickly and pray to god that they will run back to you before agroing the main team. If not don't bother with it, just continue doing what you're supposed to do. When you have agroed the Terrorwebs, hug the right wall and pull back a bit. Make sure that the 2 active dryders are in each others wastrels range, and aim for the derp to move into the main ball of terrorwebs. Once in position start spiking on the 2 active terrorwebs, maintain your enchants and continue doing so untill the main team comes in to spike it all down. Once the spike is done, again help finishing off survivors if there are any. Vale : Once Vale is safely popped the Spiker or SoS will take the quest immediatly. You and the SoS will kill the top group, just HoS on the SoS or DC in Tortured spirits. Make sure to have your Zealous Scythe up and attack the spirits for energy. For those who don't know this, the spirits in Vale have a passive effect that makes hexes last only half the normal time on them. So your Wastrels Demise won't do any good, but your Worry will trigger before it's recharged. Therefore the way to go is to just spam Worry on recharge. When your top is done, just HoS in the SoS to get out of the Hill. If the Emo had to fuse souls (and tortured spirits are near the garden) tell the emo to do the first garden pull, in that way you will save a maximum amount of safe souls and you'll not RED ENGINE GORED ENGINE GORED ENGINE GORED ENGINE GO up the Vale. Usually the spiker will help you with this spike so it will take a few seconds. When you've done that, run to the lab for UWG. UWG : Before starting UWG make sure that you switch to your Illusion headpiece. The most important thing to mention for UWG the the skill order for killing keepers. With this build it's completely spawn dependant how you are going to kill your keepers the quickest. What I would normally do for casual runs, is IoP > Demise > Worry, then wait untill I see worry trigger (You can see this by the keeper taking a larger chunk of damage within a second than normally) Then another set of IoP, Demise and Worry, wait untill I see worry trigger again, then cast IoP and Demise again, then you're good to move on. A mutch quicker, yet spawn dependant way to kill keepers, is relying on terrorwebs standing in wastrel range of the keeper. What you would do in this case is cast IoP > Demise > Worry on the keeper, switch to the terrorweb close to the keeper, put a Demise and Worry on that, switch back to the keeper, and put IoP > Demise > Worry on the keeper again when he's at around half HP, switch back to the terrorweb for a final Wastrels Demise. d) Tips : Further more I don't really feel like writing out the complete path of UWG. Might add some more info later on. Just some final tips for UWG though; - Avoid getting stuck in between Vengefulls - Avoid skellie agro as mutch as possible. Use safespots to your adventage. - Don't rush yourself. Rushing too mutch is the #1 reason why people get stuck and die during UWG. In Casual (not fast ones) i recommand using this bar : 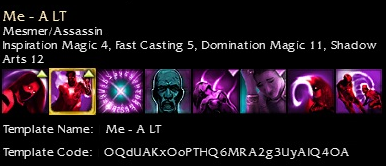 It will train you on how to do UWG without IoP, in that way when you'll switch back to the classic bar, UWG will be way easier for you (and you'll be faster). Here you can see a video (the last keeper is missing) on how to do it https://www.youtube.com/watch?v=Wg6iumakMag Otherwise there is a video on how to do the classic LT job (classic bar) : https://www.youtube.com/watch?v=9aKW71iZgAY Credits to Jordi for the original LT tutorial on NAME forum. VIII - EMo :
a) BAR
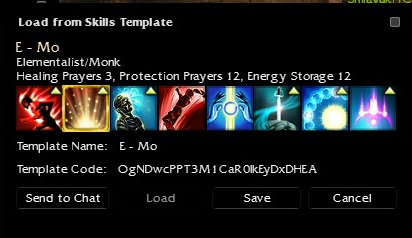 Template : OgNDwcPPT3M1CaR0lkEyDxDHEA b) Weapons and armor : As Emo you need one armor (full energy) Weapons : A 20/40 protective staff for bonding at the beginning A full energy staff with 20% enchant Pcons : Cupake, candy corn, apple, slice of pie (or rock) and res scrolls c) The complete run : When you enter in Uw, pop a slice of pie (or a rock) and a candy corn, make sure you have your protective staff equiped and bond the LT (prot bond first) then bond the T2 (only prot bond). After that, use ER and bond yourself then bond the SoS and the Spiker (prot bond only, otherwise they are bad). Always spamm SB and BS for your energy, when the ball is down, EE the spiker (or the SoS) and always make sure the LT is in your aggro buble. Keep the Vale team alive while they spike the skele then stay away from the ball (unless the LT needs a fuse). When the ball is dead, go to the stairs and be ready for escort. During escort, you got to fuse the LT (just before the SoS blocks with his spirits) always keep an eye on new souls if your Vale is weak and make sure to infuse your team. For Vale, you got to hide yourself behind the house while the Vale spikes skeles, make sure to keep them alive. When skeles are dead, stand close to the aggro buble of the LT, when graspings will be dead, 3 souls will spawn, try to keep them alive (SB is really usefull here). After that, you'll tank the first group of the quest, once again, try to keep alive souls and keep an eye on new souls, if one of them is taking damages, you got to fuse them so be ready and don't wait because you're too lazy. For UWG, take the quest when the LT is ready and try to ping every Soul keepers for the LT. d) TIPS : There is not TIPS about the Emo job, it is the easier in UW, I don't have any video too, you'll probably be able to find some on youtube. IX - Dhuum Sets :
It's very important to have dhuum sets, so you can resist from dhuum judgement and you will not decrease PI damages.
Rangers: 1) 61ar set w/+1 marksmanship head from Amnoon Oasis (Or 55 armor from Seitung harbor but use war supply for dhuum) 2) Stalwart insignias vs. phys dmg from minions and 5 superior runes of your choice (1 rune sup. marks.) 3) A q9 Zealous Shortbow of Defence/Warding with "Brawn over Brains" for more damages 4) Pcons: egg+corn to get 9 marks. and an attack speed boost of your choice (rocks or pie) ------------------------------------------------------------------------------------------------------------------------ T4 and Emo: 1) Normal 60ar set w/any kind of head 2) Pyromancer insignias and 5 superior runes of your choice 3) Zealous spear of Warding with "Don't Think Twice" (10% HCT) (not important if you don't have it) and a focus w/+10 vs. fire insc and 10% HCT (not important if you don't have it) 4) Pcons: Just an attack speed boost 5) Killing yourself as emo: Cast ether only once when you enter chamber. after he comes back and glitches fuse yourself to a very low hp and use burning. If that won't kill you then judgement will. ------------------------------------------------------------------------------------------------------------------------ SoS with EoE: 1) 60A Set 2) 5 Sup Runes and Brawler's Insignia's 3) Zealous spear of Warding with "Don't Think Twice" (10% HCT) (not important if you don't have it) and a shield w/+10 vs fire insc. ------------------------------------------------------------------------------------------------------------------------ Mesmers: 1) Normal 60ar set w/any head 2) Prodigy's insignias and 5 superior runes of your choice 3) Zealous spear of Warding with "Don't Think Twice" (10% HCT) (not important if you don't have it) and a shield w/+10 vs fire insc. ------------------------------------------------------------------------------------------------------------------------ Necro: *You wear the armor during the entire run so no need to swap that (only swap weapons) **Redrock/full rainbow is optional but makes skill timing easier with fast casts of qz and barbs 1) 60ar set w. +1 curses head 2)Tormentor's insignias x5 + 1x sup. curses, 1x sup. soul reaping, 2x vitality rune, 1x sup vigor 3)Zealous spear of Warding with "Don't Think Twice" (10% HCT) (not important if you don't have it) and shield w/+10 vs fire 4)Egg+corn+pie+**redrock+0% morale (you will have EXACTLY 500 hp) 5) ~50 Ghosts in a box for e. management (some1 else can pop them for you to reduce the amount of micro you have to do). SoS with perma QZ : 1) 60ar set w. +1 Spawning power head 2) Shaman's insignias x5 + 1 sup Spawning, and full energy (you can use a sup vigor, doesn't really matter) 3) Zealous spear of Warding with "Don't Think Twice" (10% HCT) (not important if you don't have it) and shield w/ +10 vs fire and +30 hp. 4) Egg + Corn + apple + cupcake + pie (or rock) and +10% morale to have max energy possible. 5) High energy focus for lasts judgments 6) High energy set in case you're bad IF YOU NEED TO DIE AT DHUUM BUT YOU STILL GOT PCONS UP, GET OUT YOUR ARMOR SO HE WILL KILL YOU IN 2 WAVES X - Dhuum :
If you're the emo:
You want a low hp set, bond the dhuum person (either the rit or the necro) and your stone, get in position and pop the stone a few seconds before the last person enters the room, for a clean glitch just face the dhuum person and the stone will sit at a good position unless it runs forward. For a solid glitch you want dhuum to be parallel to you with the stone exactly in the middle, here is an example of a clean glitch:  Green being you, black being the stone, and red being Dhuum. This is an unstable glitch, don't expect it to hold (especially if someone moves), be wary of where Dhuum pops up, because he will run at you in that direction and you may need to adjust your position:  Glitching on a turtle: Glitching on a turtle is by far the easiest stone to glitch on, simply stand in the middle of the green ring of the turtle. Glitching on a rider: This is a little trickier because riders have a smaller green ring, but still very simple. You want your green ring to be a little past the edge of the dream rider's green ring, like so: 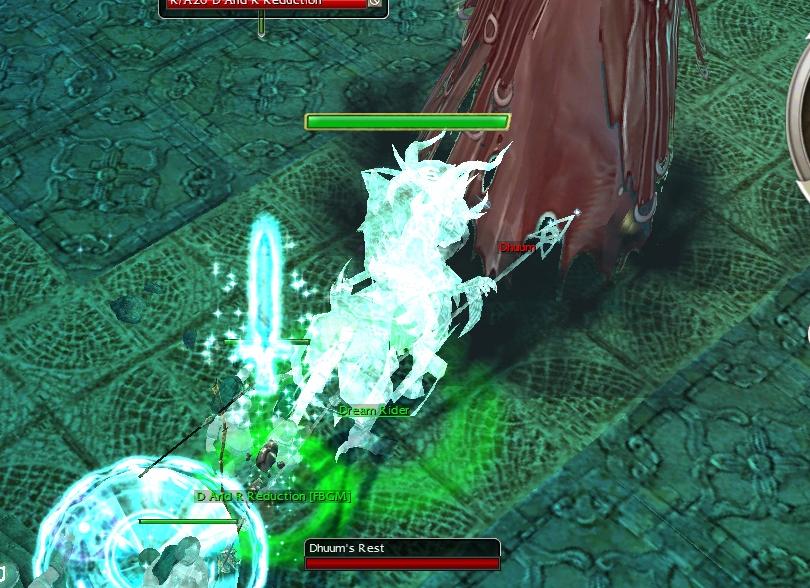 This is the perfect place to glitch with a rider and will be a very stable glitch. I would also recommend infusing the rider on judgement so the glitch holds. Dhuum as a soul: A lot of people have been very bad as souls recently and it has lead to a lot of significantly slower dhuums. You have 5 skills, rest, spiritual healing, encase skeleton, DP removal, and fury. At the start you'll need to assess the situation and adjust your routine accordingly. If Dhuum glitches instantly: Very simple, just spam rest, auto attack dhuum and heal anyone taking damage (watch for unbonded squishies at judgement, mesmers, eles, etc) if noone is taking significant damage, heal the stone on judgement. When the glitch is stable move forward and stand on the emo. If Dhuum doesn't glitch: There will be champions and minions running around bashing on everyone, spam heal whoever is tanking the champion and auto attack it. Under honor it will die very quickly. If it wasn't an instant glitch it is unlikely everyone will be bonded so be especially careful during judgement, heal anyone taking significant damage. If Dhuum uses Weight of Dhuum on the stone, heal it and use 4 (DP removal) on it. If Dhuum runs around, run through the stone to get on the opposite side of dhuum, if you go around dhuum will just follow you around. If he drops, prepare for him to pop up again as quickly as possible, dealing with all the minions and getting the stone in position. Rinse and repeat until you have a stable glitch, then continue as normal. AND BE SURE TO HEAL PEOPLE Credits to dave for the tutorial Last edited by C to the H; Nov 30, 2014 at 05:42 PM // 17:42.. |

|

|
 Nov 18, 2014, 05:00 PM // 17:00
|
#2 |
|
Jungle Guide
Join Date: Sep 2013
Location: In Z-Way We Trust.
Guild: [PhD]-[ァアァ]-[pupu]
|
+1 on this post.
Detailed and handy guide for the new players and uwsc learning players. |

|

|
 Nov 18, 2014, 05:13 PM // 17:13
|
#3 |
|
Ascalonian Squire
Join Date: Nov 2014
Guild: SenT/RiP
Profession: R/A
|
|

|

|
 Nov 18, 2014, 05:20 PM // 17:20
|
#4 |
|
Furnace Stoker
Join Date: Jul 2009
Location: London UK
Guild: Teh Academy [PhD]. Officer. Gentleman
Profession: W/N
|
This makes me want to UWSC again. Happy days. Terrible drops from the chest for me though....
Have some internet points. Max |

|

|
 |
|
«
Previous Thread
|
Next Thread
»
| Thread Tools | |
| Display Modes | |
|
|
All times are GMT. The time now is 09:49 AM // 09:49.


 Linear Mode


